How to erase free space on a hard drive quickly and easily?
I want to sell my ubuntu laptop which I use mostly for surfing the web. I want to make it difficult to recover all the data which I deleted from the laptop. I heard that we can do this by overwriting the free space on the hard drive with some data like zeros. I have seen a few methods like sfill on this forum and elsewhere, which ask me to run a bunch of commands. But none of the answers are easy to understand or have step by step instructions. Some of them ask you to find out the mount point and other technical stuff, just to do a simple erase. I don’t have the time to master linux, just so that I can do such a simple thing. I was able to erase my windows laptop easily and the tool even showed me the status which sfill does not even do. So, please tell me how I can wipe the free space on my hard drive easily and quickly. Please provide step by step instructions starting from how to install the erasing tool, how to run it, which options to choose for a quick and basic erase (i.e. not military grade). Thank you!
I would probably use dban (single-pass) to wipe the disk, then re-install a Ubuntu system on it. Even if you leave your installed Ubuntu on it; if you’ve used it, a quantity of data will exist in used portions of the disk (not just free space). FYI: this is a forum, (ubuntuforums.org is the Ubuntu Forums site) but a Q&A site and fyi: the windows tools are usually pretty easy to reverse. I for practice reverse people’s «erasures» (data recovery practice) and I’m not a technician.. so be careful.
1 Answer 1
(Since you’ve specified that the laptop has a hard drive, I’ll give instructions for that here, but in case you actually have an SSD, you’ll want to follow the Memory Cell Clearing instructions on the Arch Wiki, which are a little more involved but work on Ubuntu and are much faster.)
As @guiverc suggested, DBAN is a good option here, but there’s a more convenient way to use it, since you’ll be reinstalling Ubuntu anyway. First, make a bootable Ubuntu USB stick like you normally would for an Ubuntu install. Boot into a live system from the USB stick (as Ubuntu can’t erase your hard drive if it’s running off it).
Open a terminal on the live system, and install nwipe (which is DBAN packaged for Linux):
$ sudo add-apt-repository universe $ sudo apt install nwipe Next, determine the device name of your hard drive. The easiest way to do this is by running the Disks tool included with Ubuntu. Select your hard drive, and it will show a device path like /dev/sda in the title bar. (Here’s an example screenshot; you want the name without a number.) Once you have this path, run nwipe in your terminal (replacing /dev/sda with your drive’s device path, if it’s different):
nwipe has a number of different presets, the default being overwriting with three passes of random data and one of zeros. (You can choose more or fewer passes depending on how much time you have.) Press Shift+S to get it started, and then let it run — it can take 1–12 hours, depending on the size and speed of the drive. (A 1TB drive generally takes closer to 12 on the default setting.)
Once it’s done, you’ll need to reinstall Ubuntu. (If you’re selling or giving away the laptop, you might find the OEM install mode useful.)
How to Wipe Files / Free Space to Protect Against Recovering in Ubuntu

This simple tutorial shows beginners how to easily wipe files, folder, and/or free disk space to protect your files from recovering in Ubuntu.
As you may know, any deleted files can be easily restored from the trash can. Even after you emptied the trash, files can still be recovered. So to prevent information leakage and protect privacy, you have to ‘wipe’ or ‘shred’ files.
1.) Firstly, open terminal either from system app launcher or by pressing Ctrl+Alt+T on keyboard.
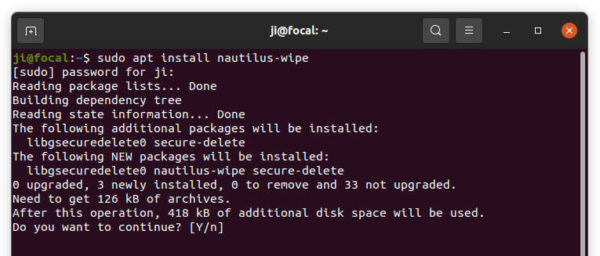
2.) When terminal opens, run command to install nautilus-wipe :
sudo apt install nautilus-wipe
The package adds ability to wipe files, folders, and free disk space via context menu.
3.) Finally restart Nautilus file browser via command to apply change:
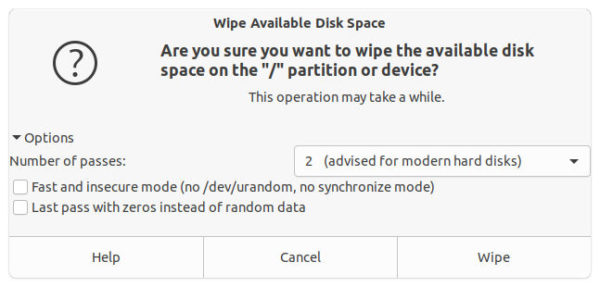
After that, you can right-click on any file or folder to ‘wipe’ or ‘wipe available disk space’.
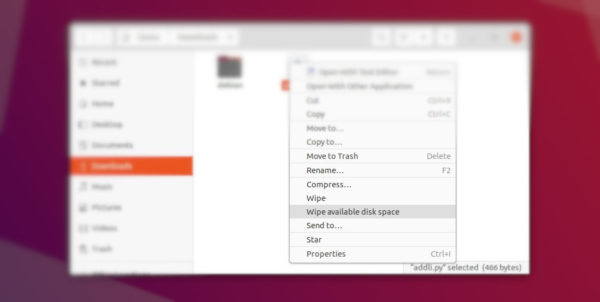
NOTE ‘wipe available disk space’ will overwrite the free space in your system disk, so your data will not recoverable. And the process can take quite a few minutes slowing down your system.
In addition to protect your privacy, you can use BleachBit to clear caches. As well, the tool offers options to shred files, folders, and wipe free space.


Ji m
I’m a freelance blogger who started using Ubuntu in 2007 and wishes to share my experiences and some useful tips with Ubuntu beginners and lovers. Please comment to remind me outdated tutorial! And, notify me if you find any typo/grammar/language mistakes. English is not my native language. Contact me via [email protected] Buy me a coffee: https://ko-fi.com/ubuntuhandbook1
2 responses to How to Wipe Files / Free Space to Protect Against Recovering in Ubuntu
On the delete files so they are not recoverable thread:
Ctrl-t for a terminal:
Determine the location of the files by using the commands “updated” and “locate”
At the terminal enter:
>sudo rm -rF /home//documents var MailPoetForm = ;
Wipe Free Space

Wipe Free Space — консольная C (си) утилита для зачистки свободного пространства на жестких дисках и внешних носителях от «остаточной информации«.

Остаточная информация — информация на запоминающем устройстве, оставшаяся после формально удалённых файловым менеджером данных. Остаточные данные могут привести к непреднамеренному распространению конфиденциальной информации, для избежания этого применяется множество методов (в том числе и программных).

Используя Wipe Free Space можно надёжно уничтожить «остаточные данные» так чтобы удалённые файлы не могли быть восстановлены (любыми средствами), поддерживается работа с большинством существующих файловых систем (Ext2/3/4, NTFS, XFS, ReiserFSv3/4, FAT12/16/32, MinixFS1/2, JFS и др), процесс удаления может происходить в фоновом и подробном режиме (отображается текущее состояние).

Для безопасного удаления данных Wipe Free Space может использовать несколько алгоритмов и методов (Gutmann, DoD, Schneier и random) перезаписи (нулями, единицами, случайными данными), при работе утилиты свободное пространство на носителе не уменьшается. Утилиту можно запускать с более высоким или низким приоритетом (например используя renice), не рекомендуется запускать утилиту с правами администратора ( root ).

WipeFreeSpaceGUI — официальный Java (Java Swing) графический интерфейс дающий более простой и удобный доступ к большинству функциональных возможностей консольной утилиты.


Лицензия: GNU General Public License version 2.0 (GPLv2)