- How to Install GUI (Win-Kex) for Kali Linux in WSL2
- Prerequisite
- Installation of Win-Kex
- Troubleshoot
- Useful Win-KeX commands
- Please Share This Share this content
- This Post Has 2 Comments
- Kali Linux получил графический интерфейс для подсистемы Windows для Linux (WSL2). Инструкция по установке
- Как в Windows 10 запустить Kali Linux с графической оболочкой
- Установка дистрибутива Linux из Windows Store
- Запуск Kali с графической средой
How to Install GUI (Win-Kex) for Kali Linux in WSL2
In the last article, we have guided you on how to Install WSL2 with Kali Linux on Windows 10, and we have received immense requests for the GUI Installation guide.
So, Without taking any further delay, let start to Install GUI for Kali Linux on WSL2.
Prerequisite
To continue with this guide, first, you need to Install WSL2 on your Windows PC. We have already written an article on How to Install WSL2 and Kali Linux on Windows 10
First, refer to the above link then back to this GUI Installation article.
Installation of Win-Kex
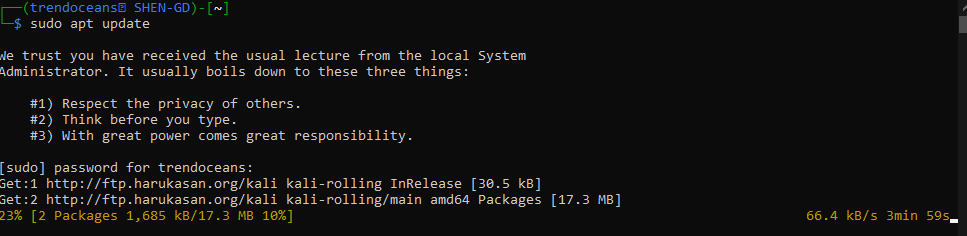
To Install Win-Kex or to get GUI, you need to pass a couple of commands, First, update and upgrade the repository.
$ sudo apt update && sudo apt upgrade -yIf you’re getting a slow apt update, make sure to use the mirror link for a fast apt update. To change the mirror link, click on the below article.
After updating the repository now, we will Install Kex for GUI. To install kex, type or copy-paste the following command in your terminal
$ sudo apt install -y kali-win-kexThis process will take some time, mainly depend upon your internet connection, and the file size is nearly 600 MB.
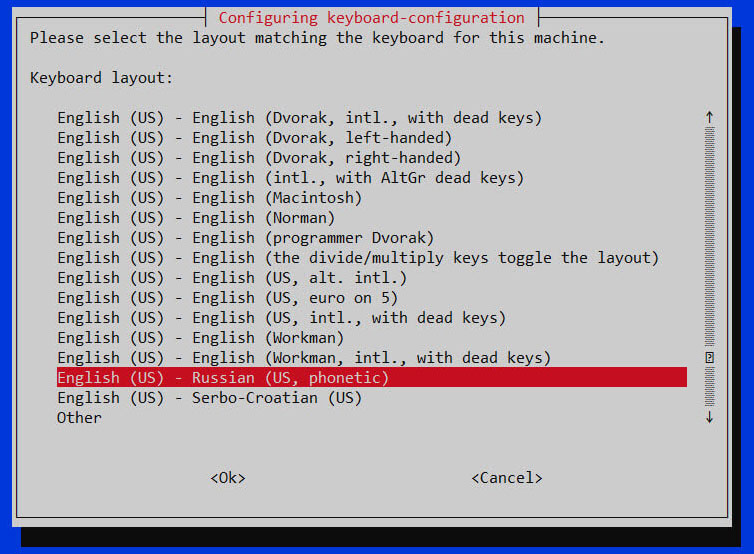
When the download is complete, you will ask to select Language. We have selected “English,” you can choose as per your preference and wait for some time to get the process complete.
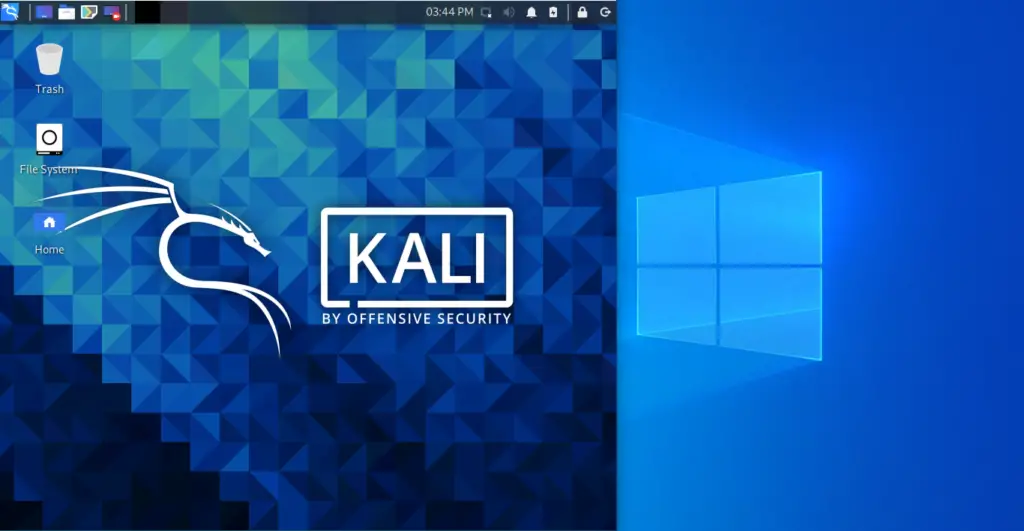
After waiting for minutes, Installation is successfully completed. Now, it’s time run and explores Kali-Linux in WSL2
To explore Kali-linux in wsl2 pass the following command:
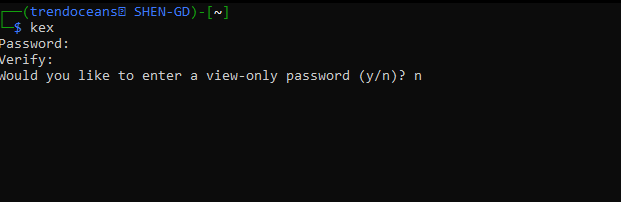
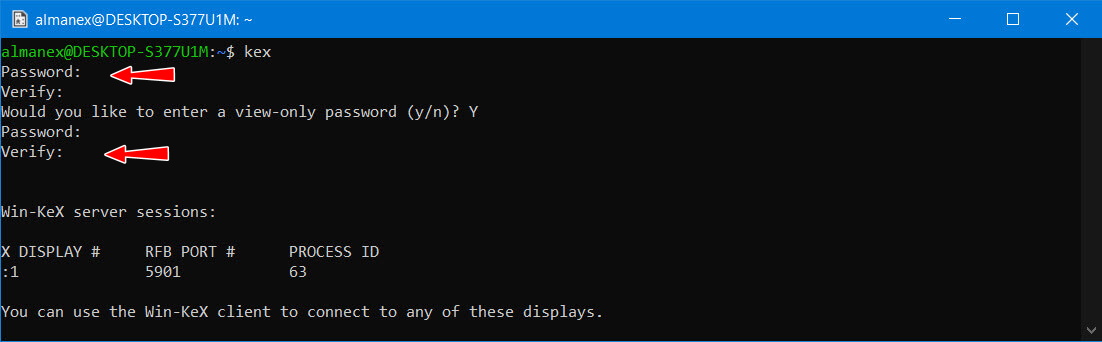
It will ask you to set a password, verify the password, and last, it will ask you to enter a view-only password, type n.
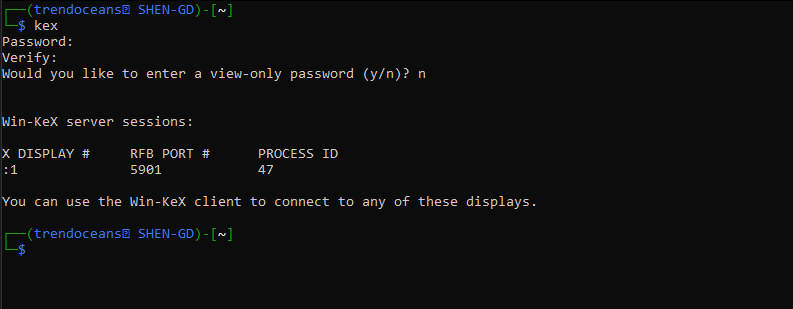
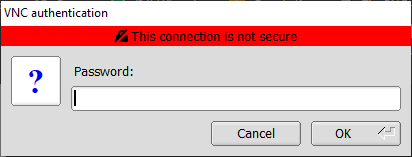
Now, wait for a second you will ask you to provide the kex password which you recently created. After that, you will able to see the screen in TigerVNC.
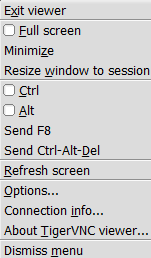
Note:- Whenever you want to exit from GUI of Kali-Linux, which runs on TigerVnc viewer, press the key “fn” with “f8” and click on Exit Viewer.
After doing this, step back to the Kali-Linux app or already running terminal and stop the running Win-Wex server session.
To stop Win-Wex server session pass the following command
Make sure to follow this step to avoid unwanted issues to occur.
Troubleshoot
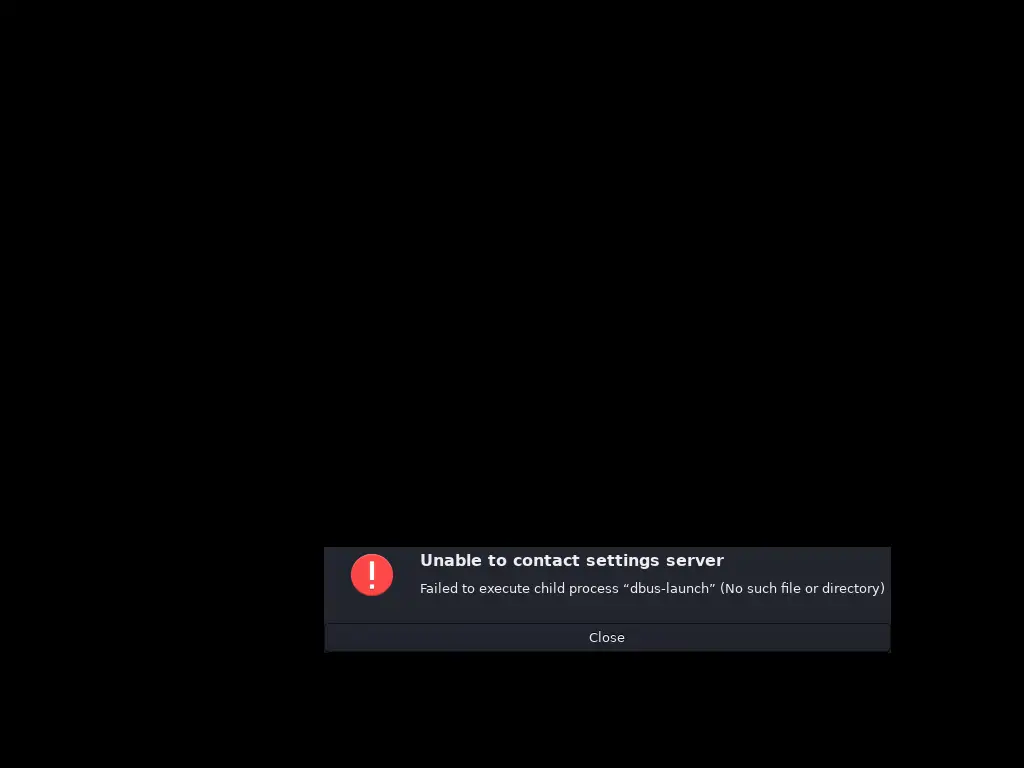
If you are not able to start kex in GUI and you’re getting an error on-screen “unable to contact settings server” with the message “Failed to execute child process dbus-launch Kali Linux (No such file or directory)” like the below image.
To resolve this issue, you need to follow a couple of steps, and your problem will be resolved.
Step 1. We need to stop the xrdp service. To stop, pass the following command in your wsl terminal.
$ sudo service xrdp stopStep 2. Now we install the missing dependencies. Because of this missing library, we cannot start the screen.
To install dbus-x11 type command
$ sudo apt install dbus-x11Step 3. We need to start xrdp service, type the below command.
$ sudo service xrdp startStep 4. Before running kex, make sure to kill Win-KeX server sessions. To kill, type both commands with sudo and without sudo.
$ sudo kex kill $ kex kill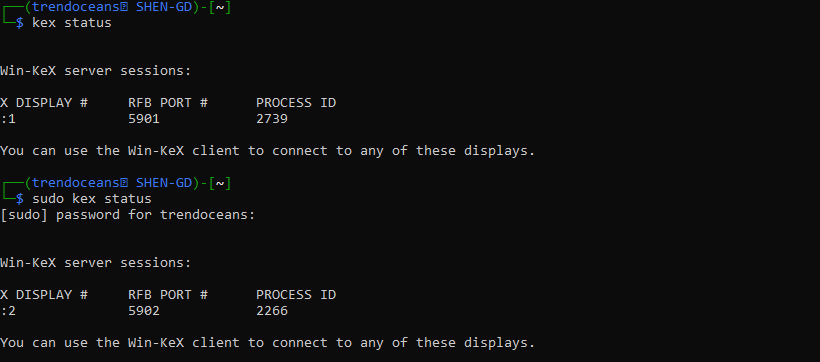
You can see two different Win-KeX servers from the above output, One without the sudo command and the other with sudo.
So, make sure to pass both the command.
Step 5. Start Win KeX service
After completing the above step, we will start the Win-Kex server for the Kali GUI version. To start, pass the following command.
You will ask to provide a Win-Kex password, which you have created on the above steps.
That’s it to resolve the dbus-x11 error. If you are facing any while step up, please go through the above steps.
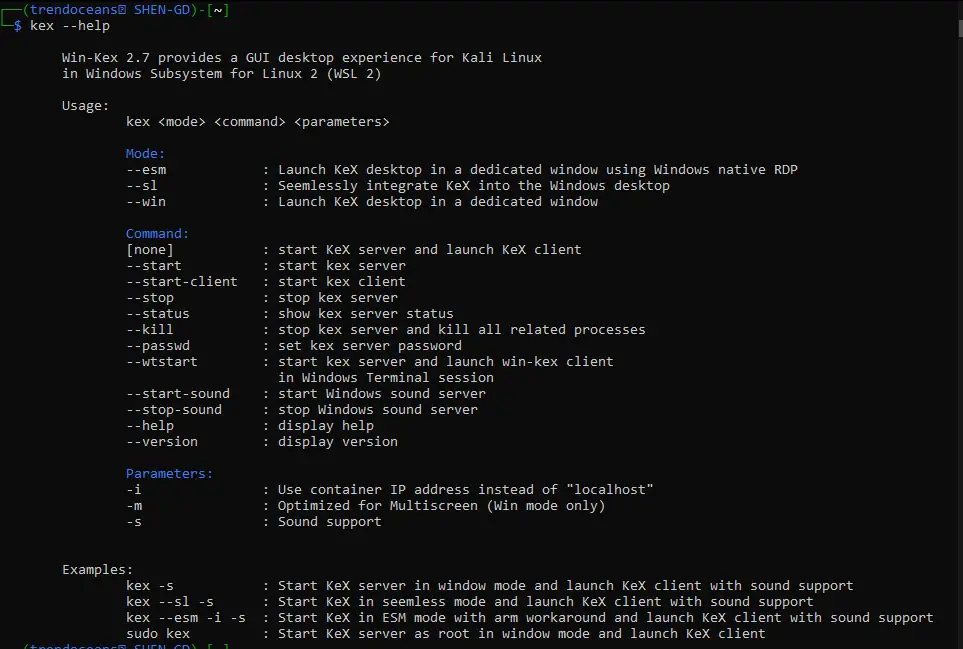
Useful Win-KeX commands
You should note the important command while accessing Win-Kex otherwise, bookmark this page for later access.
1. Start Win-Kex server session:- To start fresh Win-Kex, you need to pass single command and wait for TigerVnc to start.
2. Stop Win-Kex active server session:- If you want to stop the running Win-Kex server pass the simple command.

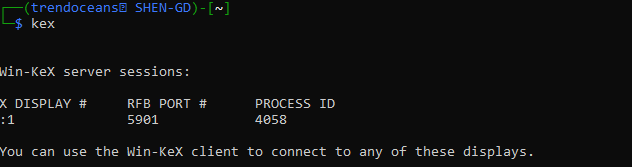
3. Check Win-Kex server session status:- When you want to check session status type the below command.
$ kex --status $ sudo kex --status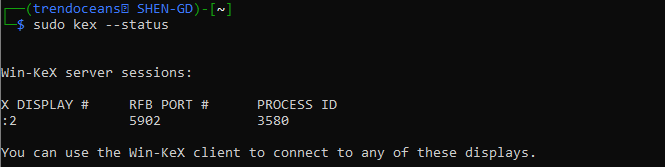
If the service is not running then you get the output beneath screen.

4. Kill Win-Kex server session:- To kill all the running Win-Kex service you can pass the following command.
$ kex --kill $ sudo kex --killIf you want to kill a specific Win-KeX server session for that, you should know the Process ID to get the process id type command in the terminal.
$ kex --status $ kex --kill 407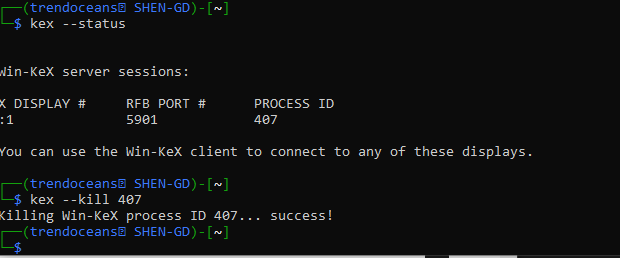
5. Password change in Win-Kex:- In case you don’t remember the Win-Kex password, you can easily reset the password with the simple command.
$ kex --passwd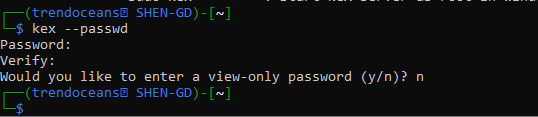
$ sudo apt install -y kali-linux-defaultIf you want to explore more handy commands for Win-Kex, you can refer to the help command.
That’s all to Install GUI or Win-Kex on WSL2. If you are stuck somewhere or need any assistance from our side, feel free to comment.
If you want me to explore more command of Win-Kex and make a separate article for that, comment us.
A man with a tech effusive who has explored some of the amazing technology stuff and is exploring more. While moving towards, I had a chance to work on Android development, Linux, AWS, and DevOps with several open-source tools.
Please Share This Share this content
This Post Has 2 Comments
Hi i did all these steps, and they worked fine, but found a few issues, if i could mention them to you:
1) After following instructions, i type kex and get the GUI over all my monitors, howver i have to keep pressing F8 to just make the system display on my primary monitor, it does’nt save the fact i only want my primary display for Kali. Even when you log off Kali it says save settings for future sessions, i wonder if you could help with this.
2) Once i type kex gui starts without networking (my PC has a lan connection)
3) Once i type kex gui starts without sound, and when i type kex -s, i get an error, i also get an error if i type kex –sl or kex –sl -s.
Im new to WSL2 and linux, but i wanted to get involved with linux from tutorials on line, as i’m getting a bit bored of windows (but dont want to change just yet), so WSL2 seems a good way to investigate linux. I hope this makes sense and hope you may be able to help. Thanks
Kali Linux получил графический интерфейс для подсистемы Windows для Linux (WSL2). Инструкция по установке
Команда разработчиков Kali Linux представила графический интерфейс для подсистемы Windows для Linux (WSL). Решение называется Win-Kex (Windows + Kali Desktop EXperience). Теперь можно запускать популярный дистрибутив для пентеста на ПК с Windows 10 в WSL2 с GUI.
Специалисты портала Bleeping Computer проверили, что это действительно работает. Они опубликовали свою инструкцию по установке и запуску Kali Linux с графическим интерфейсом для подсистемы Windows для Linux (WSL2).
Установка Kali Linux с GUI возможна только на ПК с ОС Windows 10 версии 2004.
На подготовительном этапе необходимо в ОС активировать подсистему Windows для Linux.
Открыть PowerShell (сейчас и далее под администратором) и запустить:
Enable-WindowsOptionalFeature -Online -FeatureName Microsoft-Windows-Subsystem-LinuxОткрыть PowerShell и запустить:
dism.exe /online /enable-feature /featurename:VirtualMachinePlatform /all /norestartdism.exe /online /enable-feature /featurename:Microsoft-Windows-Subsystem-Linux /all /norestartДалее необходимо скачать и установить WSL2.
Потом нужно открыть PowerShell и запустить:
Далее нужно установить Kali Linux из магазина Microsoft Store.
Чтобы поменять тип установки kali-linux с WSL1 на WSL2 нужно в PowerShell запустить:
wsl --set-version kali-linux 2Далее нужно выполнить установку и запустить Kali Linux.
Потом нужно установить пакет Win-KeX.
sudo apt update && sudo apt install kali-win-kexsudo apt update sudo apt dist-upgrade sudo apt install -y kali-win-kexМожно также установить расширенную сборку Kali Linux.
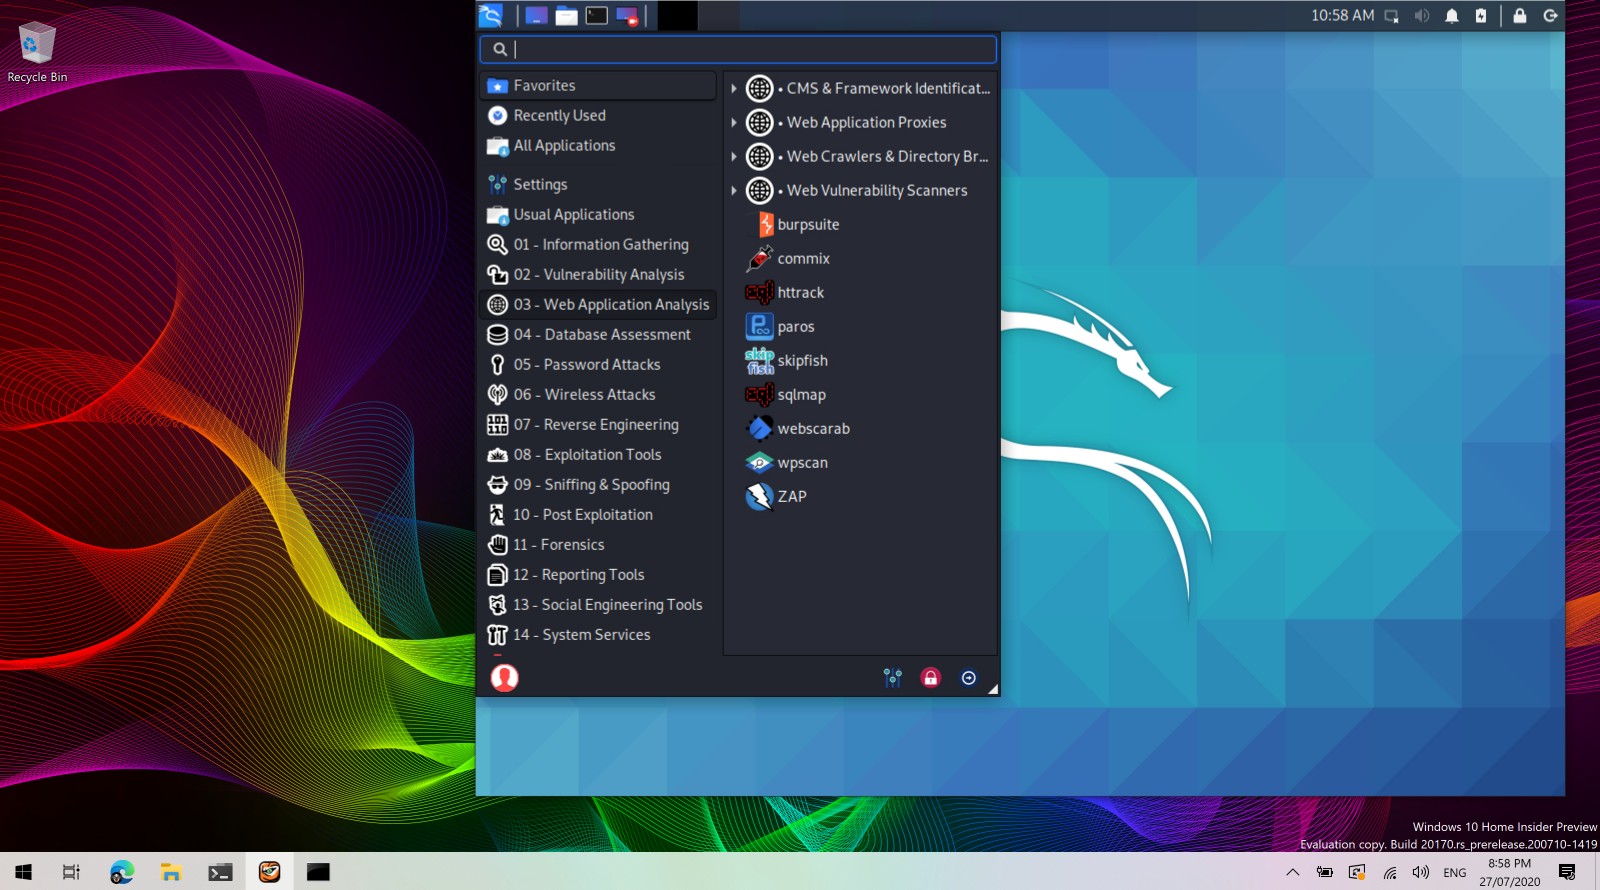
sudo apt install kali-linux-largeПосле окончание установки GUI для Kali Linux запускается командой «kex».
Как в Windows 10 запустить Kali Linux с графической оболочкой
Выпустив вторую версию WLS , Microsoft открыла перед разработчиками новые возможности, которыми они не преминули воспользоваться. Теперь вы можете установить в свою Windows 10 Kali Linux с графической оболочкой Win-KeX и поддержкой звука. Естественно, всё это доступно только в 64-битных системах с поддержкой виртуализации. Итак, первое, что вам нужно сделать, это установить WSL 2 , если этого не было сделано раньше.
Для этого в запущенной с админскими правами PowerShell выполняем указанную на скриншоте команду и подтверждаем установку вводом Y:

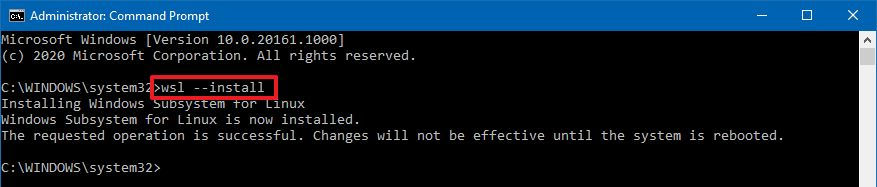
После подтверждения компьютер будет перезагружен. Для установки WSL можно использовать и классическую командную строку, выполнив в ней сначала wsl —install .
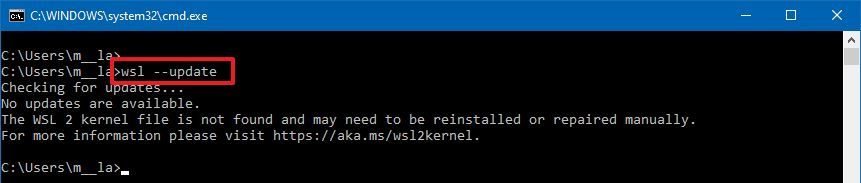
А после перезагрузки wsl —update , обновившись до актуальной на данный момент версии подсистемы.
Затем вам нужно будет скачать с официального ресурса aka.ms/wsl2kernel пакет обновления ядра Linux2.
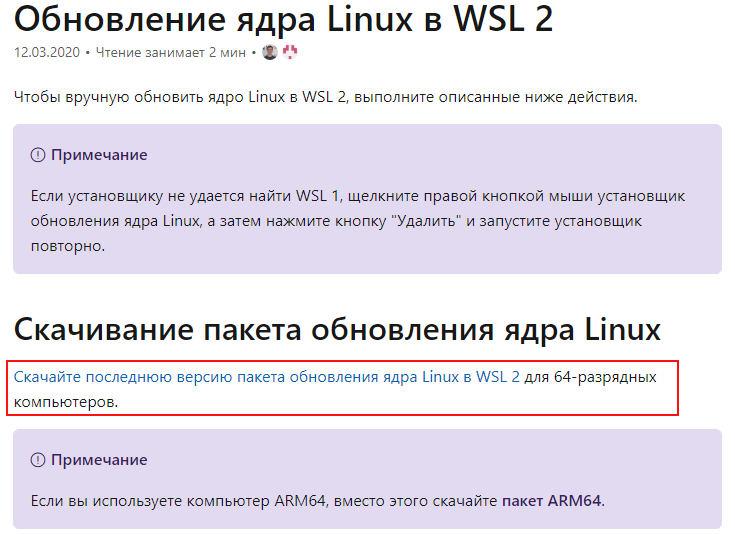
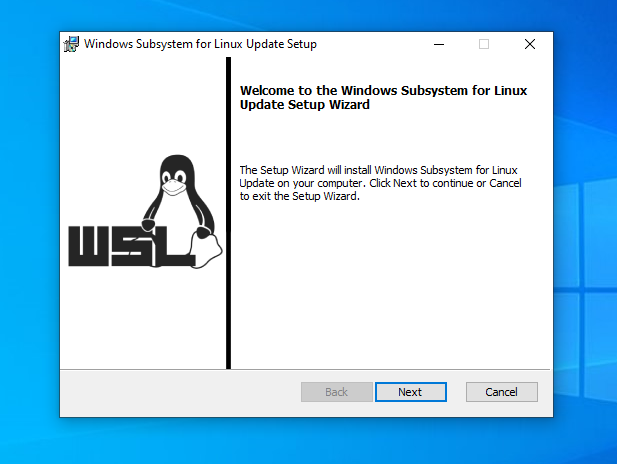
И установить его как обычную программу.
Завершив инсталляцию, вновь запустите PowerShell с админскими правами и выполните команду wsl —set-default-version 2 , чтобы сделать WSL 2 используемой по умолчанию.

Установка дистрибутива Linux из Windows Store
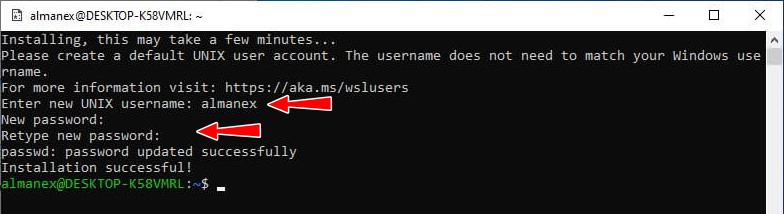
Полдела сделано, теперь открывайте Магазин Windows 10 и устанавливайте из него дистрибутив Kali Linux , а когда установите, тут же запустите и в открывшейся консоли задайте новый логин и пароль владельца.
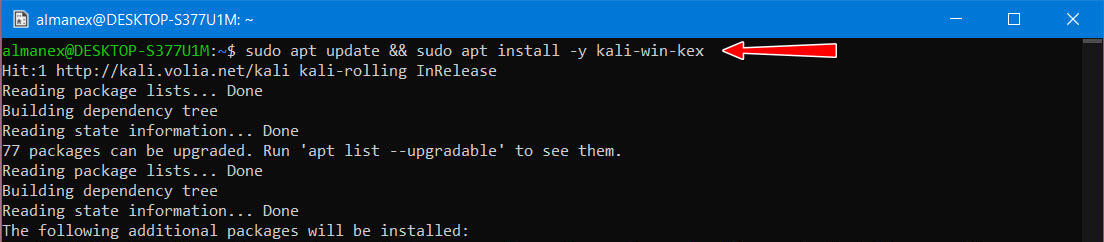
Далее инсталлируйте пакеты Win kex , командой sudo apt update && sudo apt install -y kali-win-kex .
В процессе установки появится окно выбора раскладки, укажите подходящий вам вариант из того, что будет доступно.
Запуск Kali с графической средой
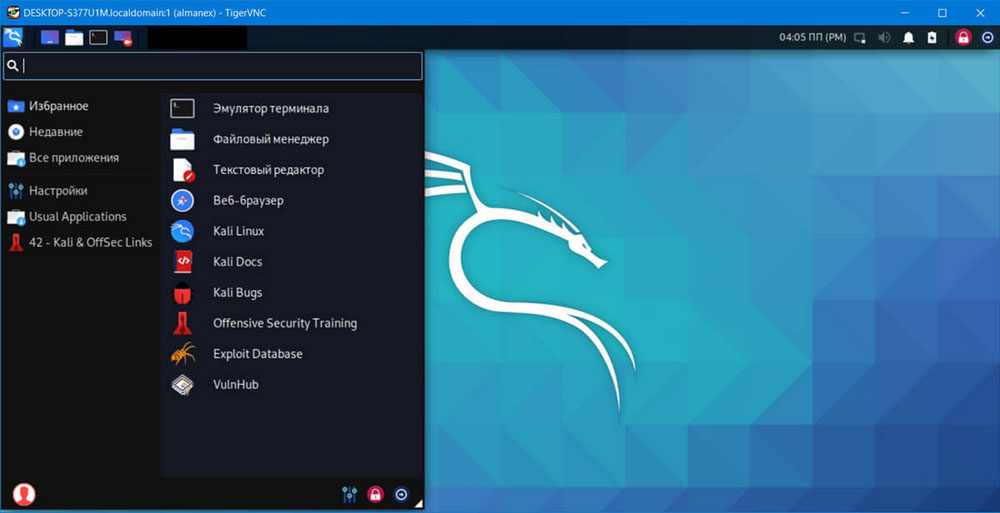
Запускается система с графическим десктопом через терминал командой kex с подтверждением действия вводом ранее заданного пароля администратора и нажатием Y.
Всё готово, при этом у вас должен загрузиться десктоп Kali Linux .
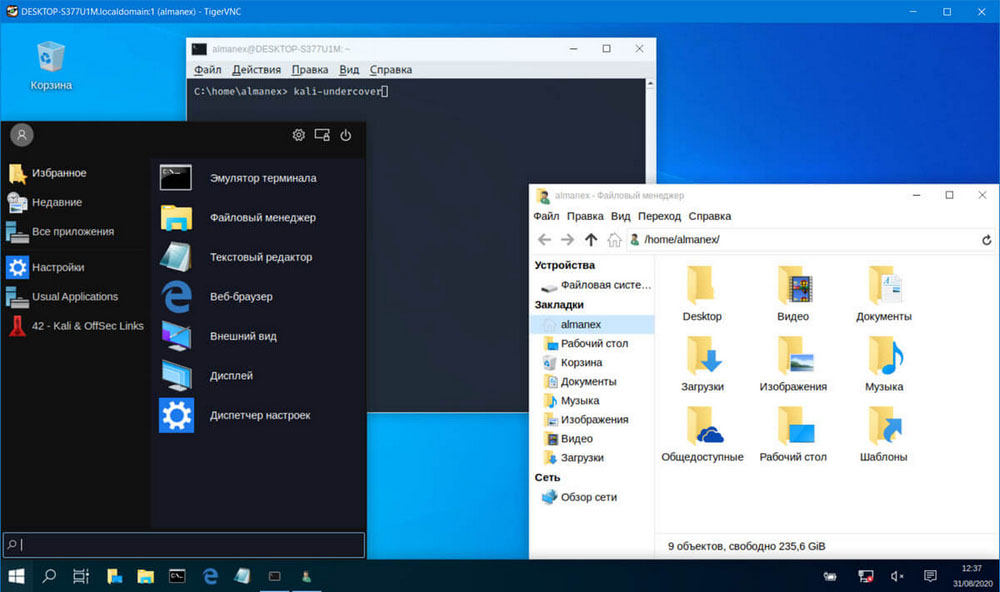
Который, кстати, вы можете сделать похожим на виндовый и наоборот, выполнив в терминале команду kali-undercover .
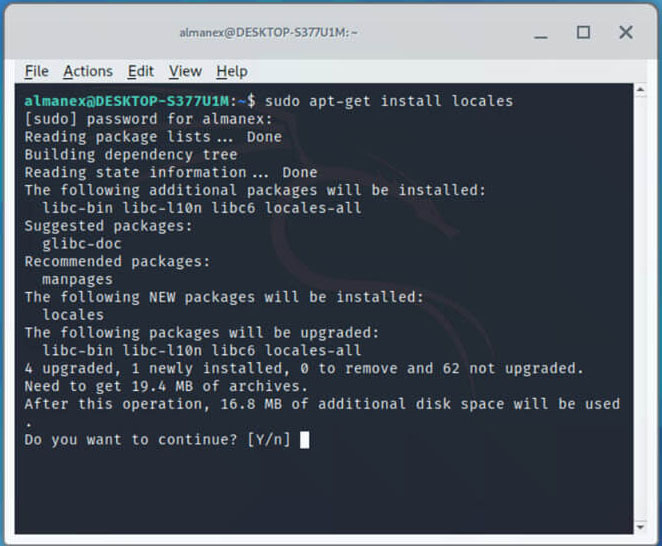
Что еще можно сделать, так это русифицировать оболочку, вызвав командой sudo apt-get install locales ,
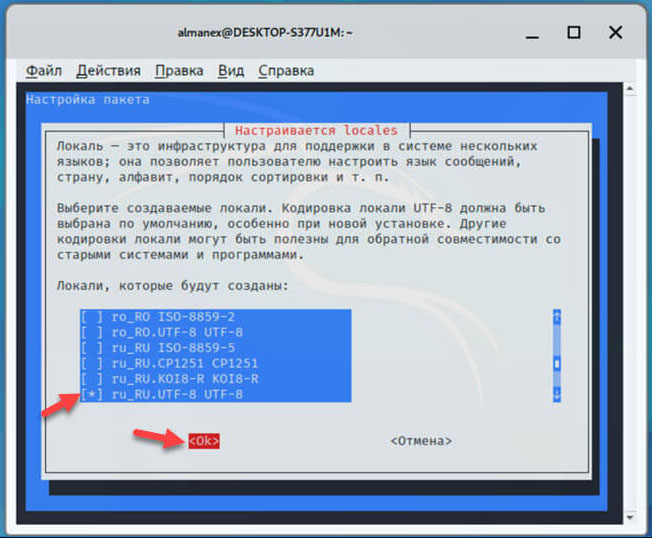
окно выбора локализации, отметив в оном Ru_RU.UTF-8 UTF-8,
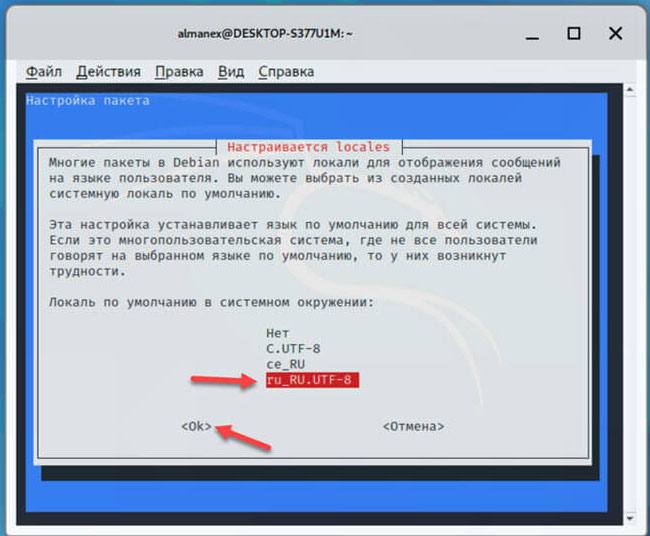
а затем выбрать его языком по умолчанию.
Наконец, выполнить в терминале одну за другой эти четыре команды:
sudo apt-get update
sudo apt-get upgrade
sudo apt-get dist-upgrade
kex kill

Последняя команда завершит работу Linux, поэтому вам нужно буде запустить ее снова командой kex . У всего этого есть небольшой минус — в Kali у вас не будет звука и производительность будет ниже, чем если бы система была установлена на «железо». С производительностью ничего не поделать, а вот поддержку звука в WLS2 можно включить, но для этого придется пройти совсем другую процедуру.