Connect the Printer to a Wireless (WiFi) Using WPS
Note: Wi-fi Protected Setup (WPS) is the easiest way to setup the printer on a wireless network. However, not all wireless routers support WPS.
WPS is usually activated by a button on the outside of the router. Other routers require configuration of WPS inside the router interface (usually the router’s web page). Consult the wireless router documentation for more information.
- The network cable must be unplugged from the printer to access Wireless settings on the Control Panel. If a network cable has been connected, remove it, then turn the power switch off and back on. The power switch located on the left side of the printer, toward the front. For details, refer to Power the Printer Off and On.
- Push and hold the WPS button for 2 seconds.
- Wait 2-3 minutes until the blue WPS light stops flashing.
- Wait approximately 1 minute for the printer to obtain a valid IP address.
- Print a Configuration Report to verify the printer obtained a valid IP address. For details, refer to Print a Configuration Report.
- Press and hold the red Stop button for 2-4 seconds to print the configuration report.
- Find the IP Address under Network Setup / TCP/IP Settings on the report.
- Type the IP address into your Web browser. If it connects to the printer’s CentreWare Internet Services (CWIS) page, the IP address is valid.
NOTE: Some routers have a WPS button. If the above process fails, you may also need to push the WPS button on your router for the printer to obtain the IP address. Refer to your router’s instructions.
Did this help?
Configure Wi-Fi Direct Using CentreWare Internet Services (CWIS)
Note: If you are accessing Xerox CentreWare Internet Services for the first time after printer installation, you will be prompted to change the default Administrator Account password. The initial default password is the printer serial number. For additional information, refer to Change the System Administrator Password for CentreWare Internet Services (CWIS).
You can connect to your printer from a Wi-Fi mobile device, such as a tablet, computer, or smart phone, using Wi-Fi Direct.
Note: Wi-Fi Direct is disabled by default.
Configuring Wi-Fi Direct Using Xerox CentreWare Internet Services
- From a computer (on the same network as the printer) open a Web browser.
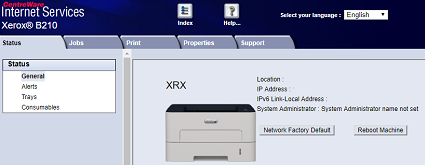
- In the Web browser address field, enter the IP address of the printer and then press Enter or Return. The CWIS home page will be displayed.
- For User Name, enter Admin.
- For Password, enter the administrator account password that was set during initial access to CWIS.
- Click OK.
Did this help?
Connect the Printer to a Wireless (Wi-Fi) Network Using the Xerox Easy Wireless Setup Program
Perform the following steps to use a wireless setup utility to connect the printer to a wireless network. The utility will walk you through the process to connect the printer to the Wi-Fi network from your computer. The utilities can be downloaded from the product’s drivers and downloads pages. The utilities can be downloaded from the product’s drivers and downloads pages on support.xerox.com.
- You cannot use your printer on a wired (Ethernet) and wireless network at the same time. If your printer is currently connected to the network with an Ethernet cable, unplug the cable.
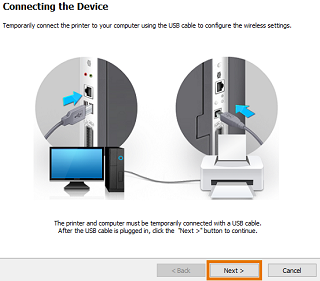
- A USB cable is temporarily needed to perform this solution. Make sure you have a functioning USB cable before you begin.
- Do not connect the USB cable until instructed to do so in the steps below.
- Follow the instructions here for Windows and Mac10.1.5 or higher OS.
- Follow the instructions here for Mac10.14 or lower OS.
- Make sure you have installed the Xerox_B210_Windows_PrintDriver_Utilities_Signed.zip utility pack for Windows. This package contains the wireless setup utility along with the print and scan drivers and Easy Printer Manager. The file is available on the product support webpage, or on the CD that was shipped with the printer.
- Run the setup.exe.
- Click on Software
- Read and accept the license agreement
- Click on Select Software in the menu
- Check the box for Easy Wireless Setup
- Click Next to install the Easy Wireless Setup utility
- Download the WiFi Setting Utility for Mac 10.15 and Higher. Note: this is a standalone file that is not included in the print driver dmg. To locate it on the product’s driver and downloads page, filter for Utilities and Applications.
- Install the program to your computer
- Download the Xerox B210 MacOS Utilities Print Driver file from the product’s drivers and download page on support.xerox.com. The file contains the Easy Printer Manager.
- Install the Easy Printer Manager application “_Printer Manager”
- Make sure your printer is connected with a USB cable to your computer
- Open Easy Printer Manager.
- From your Printer List, select your printer
- At the home screen, select Machine Settings
- Select Network Settings
- Under General, ensure Network Connectivity is set to Wireless
- Under WiFI Settings, select Wizard
- Follow the Wizard instructions to install your printer on WiFi
To Connect the Printer to a Wireless Network using Xerox Easy Wireless Setup (for Windows PC and Mac 10.15 or higher)
For Windows:
For Mac 10.15 or higher:
Note: The below pictures are applicable to the Windows setup utility. Steps may differ slightly for Mac.
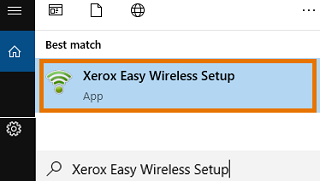
- Open the Xerox Easy Wireless Setup program. At the computer, search for and select Xerox Easy Wireless Setup to open the program. The Connecting the Device screen will be displayed.
NOTE: If the program has not been installed, install the printer software from the CD that shipped with the printer using the «Connecting to a Local Printer» method. The software can also be downloaded from the Xerox Drivers and Downloads page.
NOTE: If the network is not found, make sure the router is not set to the 5GHz wireless frequency. The router must be set to the 2.4GHz frequency as the printer does not support 5GHz. Contact your router manufacturer for additional information on how to configure the wireless frequency setting.
To Connect the Printer to a Wireless Network using Easy Printer Manager on Mac 10.14 or lower
Note: The Wireless Setup Utility is embedded in the Easy Printer Manager.
Add the printer to the WiFi Network using Easy Printer Manager


