- How To Install Linux, Apache, MySQL, PHP (LAMP) stack on Ubuntu 20.04 [Quickstart]
- Prerequisites
- Step 1 — Install Apache
- Step 2 — Install MySQL
- Step 3 — Install PHP
- Step 4 — Create a Virtual Host for your Website
- Step 5 — Test PHP with Apache
- Related Tutorials
- Установка Apache, PHP, MySQL, phpMyAdmin в Ubuntu Linux
- Установка Apache
- Проверка работоспособности сервера Apache
- Установка PHP
- Установка MySQL
- Установка phpMyAdmin
How To Install Linux, Apache, MySQL, PHP (LAMP) stack on Ubuntu 20.04 [Quickstart]
In this quickstart guide, we’ll install a LAMP stack on an Ubuntu 20.04 server.
For a more detailed version of this tutorial, with more explanations of each step, please refer to How To Install Linux, Apache, MySQL, PHP (LAMP) Stack on Ubuntu 20.04
Prerequisites
To follow this guide, you’ll need access to an Ubuntu 20.04 server as a sudo user.
Step 1 — Install Apache
Update your package manager cache and then install Apache with:
Once the installation is finished, you’ll need to adjust your firewall settings to allow HTTP traffic on your server. Run the following command to allow external access on port 80 (HTTP):
With the new firewall rule added, you can test if the server is up and running by accessing your server’s public IP address or domain name from your web browser. You’ll see a page like this:
Step 2 — Install MySQL
We’ll now install MySQL, a popular database management system used within PHP environments.
Again, use apt to acquire and install this software:
When the installation is finished, it’s recommended that you run a security script that comes pre-installed with MySQL. Start the interactive script by running:
This will ask if you want to configure the VALIDATE PASSWORD PLUGIN . Answer Y for yes, or anything else to continue without enabling. If you answer “yes”, you’ll be asked to select a level of password validation.
Your server will next ask you to select and confirm a password for the MySQL root user. Even though the default authentication method for the MySQL root user dispenses the use of a password, even when one is set, you should define a strong password here as an additional safety measure.
For the rest of the questions, press Y and hit the ENTER key at each prompt.
Note: At the time of this writing, the native MySQL PHP library mysqlnd doesn’t support caching_sha2_authentication , the default authentication method for MySQL 8. For that reason, when creating database users for PHP applications on MySQL 8, you’ll need to make sure they’re configured to use mysql_native_password instead. Please refer to step 6 of our detailed LAMP on Ubuntu 20.04 guide to learn how to do that.
Step 3 — Install PHP
To install PHP and its dependencies, run:
Once the installation is finished, you can run the following command to confirm your PHP version:
OutputPHP 7.4.3 (cli) (built: Mar 26 2020 20:24:23) ( NTS ) Copyright (c) The PHP Group Zend Engine v3.4.0, Copyright (c) Zend Technologies with Zend OPcache v7.4.3, Copyright (c), by Zend Technologies Step 4 — Create a Virtual Host for your Website
In this guide, we’ll set up a domain called your_domain, but you should replace this with your own domain name.
Apache on Ubuntu 20.04 has one server block enabled by default that is configured to serve documents from the /var/www/html directory. Instead of modifying /var/www/html , we’ll create a directory structure within /var/www for the your_domain site, leaving /var/www/html in place as the default directory to be served if a client request doesn’t match any other sites.
Create the directory for your_domain as follows:
Next, assign ownership of the directory with the $USER environment variable, which will reference your current system user:
Then, open a new configuration file in Apache’s sites-available directory using your preferred command-line editor:
This will create a new blank file. Paste in the following bare-bones configuration:
ServerName your_domain ServerAlias www.your_domain ServerAdmin webmaster@localhost DocumentRoot /var/www/your_domain ErrorLog $/error.log CustomLog $/access.log combined Save and close the file when you’re done. If you’re using nano , you can do that by pressing CTRL+X , then Y and ENTER .
You can now use a2ensite to enable the new virtual host:
To disable Apache’s default website, type:
To make sure your configuration file doesn’t contain syntax errors, run:
Finally, reload Apache so these changes take effect:
Your new website is now active, but the web root /var/www/ your_domain is still empty. Create an index.html file in that location so that we can test that the virtual host works as expected:
Include the following content in this file:
Hello World!
This is the landing page of your_domain.
Now go to your browser and access your server’s domain name or IP address once again:
You’ll see a page like this:
Step 5 — Test PHP with Apache
We’ll now create a PHP test script to confirm that Apache is able to handle and process requests for PHP files.
Create a new file named info.php inside your custom web root folder:
This will open a blank file. Add the following content inside the file:
When you are finished, save and close the file.
Go to your web browser and access your server’s domain name or IP address, followed by the script name, which in this case is info.php :
http://server_domain_or_IP/info.php You’ll see a page similar to this:

After checking the relevant information about your PHP server through that page, it’s best to remove the file you created as it contains sensitive information about your PHP environment -and your Ubuntu server. You can use rm to do so:
Related Tutorials
Here are links to more detailed guides related to this tutorial:
Thanks for learning with the DigitalOcean Community. Check out our offerings for compute, storage, networking, and managed databases.
Установка Apache, PHP, MySQL, phpMyAdmin в Ubuntu Linux
В статье рассказывается о том, как установить веб-сервер Apache, PHP, СУБД MySQL и phpMyAdmin в Ubuntu Linux.
Установка Apache
Устанавливаем Apache 2 из репозиториев. Для этого выполните команду:
sudo apt-get install apache2После установки сервер Apache обычно сразу же запускается (на экран выводится сообщение «Starting web server apache2» ).
Для управления сервером Apache мы можем воспользоваться утилитой apache2ctl . Например, можно просмотреть текущий статус сервера Apache, выполнив команду:
Команды для остановки, запуска и перезапуска сервера Apache следующие:
sudo apache2ctl stop sudo apache2ctl start sudo apache2ctl restartПроверка работоспособности сервера Apache
Вы можете проверить работоспособность Apache, набрав в браузере адрес http://localhost . Если все в порядке, то откроется пустая страница с текстом: «It works!» .
Установка PHP
Для установки PHP (версии 5) выполните в терминале команду:
sudo apt-get install php5 libapache2-mod-php5После этого нужно перезапустить веб-сервер Apache. У меня Ubuntu сделала это автоматически. Если этого не произошло выполните команду:
Установка MySQL
Для установки MySQL выполните следующую команду:
sudo apt-get install mysql-server libapache2-mod-auth-mysql php5-mysql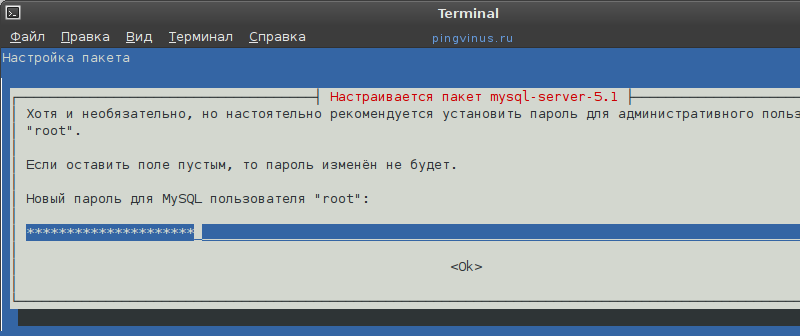
После того, как установится MySQL, должно появиться следующее окошко, в которое нужно ввести пароль. По умолчанию MySQL создает административного пользователя с именем root . В это окошко нужно вписать пароль для этого пользователя и нажать Enter , затем повторно ввести пароль.
Установка phpMyAdmin
phpMyAdmin это специальное веб-приложение для администрирования MySQL. Оно позволяет прямо из браузера управлять базами данных MySQL, выполнять SQL запросы, просматривать данные и многое другое. Для установки phpMyAdmin выполните команду:
sudo apt-get install phpmyadmin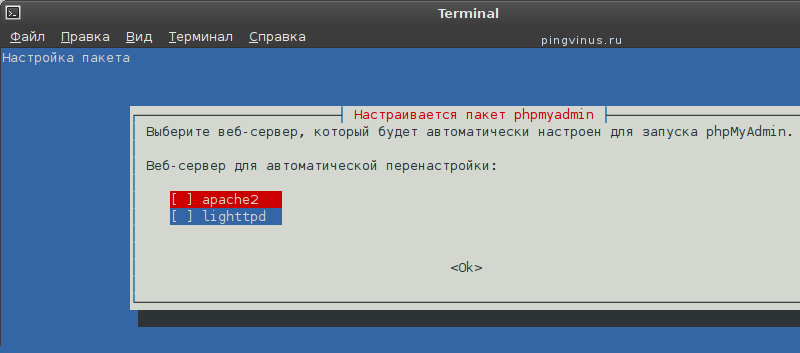
Начнется установка phpMyAdmin. В конце установки появится окошко, в котором нужно выбрать сервер apache2 (клавишей Пробел ; должна появится звездочка напротив строки apache2) и нажать Enter .
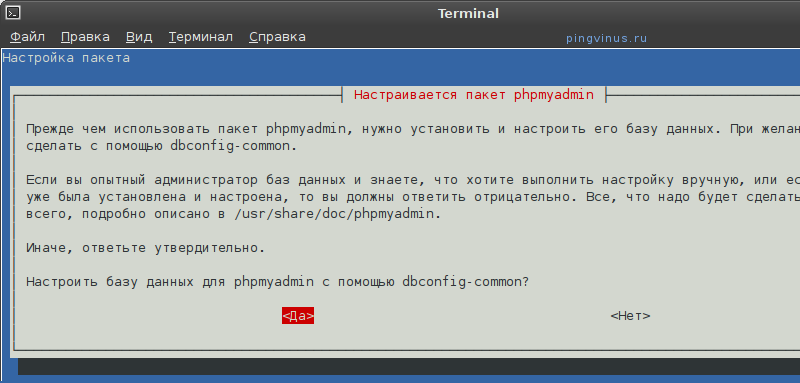
Далее вам предложат создать базу данных для phpMyAdmin. Выберите Да и нажмите Enter .
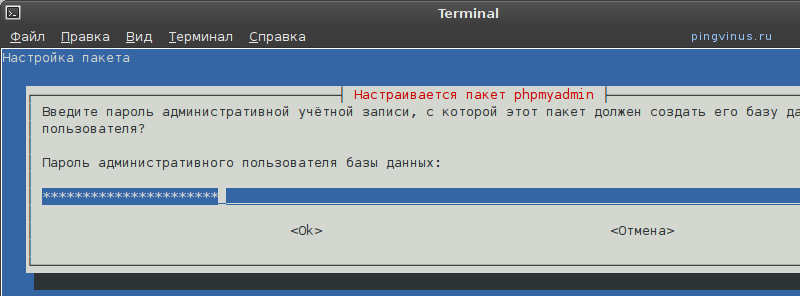
Далее введите пароль административной учетной записи для этой базы данных.
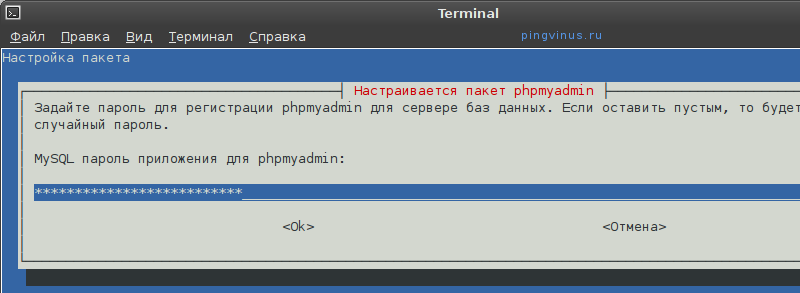
Затем введите пароль для регистрации phpMyAdmin на сервере баз данных и в следующем окошке подтверждение пароля.