- zabbix-server-mysql on Linux Mint 21 «Vanessa»
- 2. Uninstall / Remove zabbix-server-mysql package
- 3. Details of zabbix-server-mysql package
- 4. References on Linux Mint 21 «Vanessa»
- 5. The same packages on other Linux Distributions
- Download and install Zabbix
- How to Install Zabbix on Mint GNU/Linux Distro
- GNU/Linux Mint Zabbix Installation Guide
- Follow Us
- The GNU/Linux Free Software Phylosophy
- Steve Jobs’ Last Words
- Credits
- Install Zabbix 2.4.7 (Network Monitoring Tool) on Ubuntu, Mint & Debian
- 1) Prerequisites for Zabbix
- 2) Install Zabbix repository
- 3) Install Zabbix Server
- 4) Editing PHP configuration for Zabbix frontend
- 5) Start/Restart services
- 6) Zabbix frontend installation
- 7) Install zabbix agent installation
zabbix-server-mysql on Linux Mint 21 «Vanessa»
Please follow the guidance below to install zabbix-server-mysql package:
2. Uninstall / Remove zabbix-server-mysql package
Please follow the instructions below to uninstall zabbix-server-mysql package:
3. Details of zabbix-server-mysql package
Package: zabbix-server-mysql
Architecture: amd64
Version: 1:5.0.17+dfsg-1
Priority: optional
Section: universe/net
Source: zabbix
Origin: Ubuntu
Maintainer: Ubuntu Developers
Original-Maintainer: Dmitry Smirnov
Bugs: https://bugs.launchpad.net/ubuntu/+filebug
Installed-Size: 6639
Depends: libc6 (>= 2.34), libcurl3-gnutls (>= 7.28.0), libevent-2.1-7 (>= 2.1.8-stable), libgnutls30 (>= 3.7.2), libldap-2.5-0 (>= 2.5.4), libmysqlclient21 (>= 8.0.11), libodbc1 (>= 2.3.1), libopenipmi0 (>= 2.0.29), libpcre3, libsnmp40 (>= 5.9+dfsg), libssh2-1 (>= 1.0), libxml2 (>= 2.7.4), zlib1g (>= 1:1.2.0), ucf, fping, adduser, lsb-base
Recommends: default-mysql-server | virtual-mysql-server, snmpd, nmap, traceroute
Suggests: zabbix-frontend-php, logrotate, sudo, snmp-mibs-downloader
Conflicts: zabbix-proxy-mysql, zabbix-proxy-pgsql, zabbix-proxy-sqlite3, zabbix-server-pgsql
Filename: pool/universe/z/zabbix/zabbix-server-mysql_5.0.17+dfsg-1_amd64.deb
Size: 3317016
MD5sum: a41526f67177a4e7f0b0b3538527bbe6
SHA1: bce61791e98f7110ff8b8ed9253a3cd16129cafb
SHA256: a8004d02baf970d23e353f29800a2ae9e77789f1dc09d7ec83aea47ab07d88b7
SHA512: ad3f6c9e9f4c8fe2c03ec4a933bf4a1930a9803b25dfd77743cef1c0f4a33005702d2ef192506e79b75e1ca02cca72f7153c0f48cd282ba125ce3ee62a4d4241
Homepage: http://zabbix.com
Description: network monitoring solution — server (using MySQL)
Description-md5: 47873543449b5d6688721f179370dff6
4. References on Linux Mint 21 «Vanessa»
5. The same packages on other Linux Distributions
![]()
zabbix-server-mysql (1:3.0.12+dfsg-1) Ubuntu 18.04 LTS (Bionic Beaver)
![]()
zabbix-server-mysql (1:2.4.7+dfsg-2ubuntu2.1) Ubuntu 16.04 LTS (Xenial Xerus)
![]()
zabbix-server-mysql (1:5.0.2+dfsg-1) Ubuntu 20.10 (Groovy Gorilla)
![]()
zabbix-server-mysql (1:5.0.8+dfsg-1build1) Ubuntu 21.10 (Impish Indri)
![]()
zabbix-server-mysql (3.0.31-bp153.1.25) openSUSE Leap
![]()
zabbix-server-mysql (4.0.34-1.4) openSuSE Tumbleweed
![]()
zabbix-server-mysql (1:5.0.17+dfsg-1) Ubuntu 22.04 LTS (Jammy Jellyfish)
![]()
zabbix-server-mysql (1:4.0.4+dfsg-1) Debian 10 (Buster)
Download and install Zabbix

Get assistance in better understanding the benefits and potential from using Zabbix
Technical Support
Get access to the team of Zabbix experts that know every little bit of the source code
Training
- Features
- What’s new in Zabbix 6.4
- Screenshots
- System requirements
- Lifecycle & Release Policy
- License
- Documentation
- Roadmap
- By Topic
- By Industry
- For Enterprises
- Case studies
- Customers and Users
- Integrations & Templates
- Support
- Consulting
- Turn-Key Solution
- Template building
- Upgrade
- Development
- Remote troubleshooting
- Integration
- Certified User
- Certified Specialist
- Certified Professional
- Certified Expert
- Testimonials
- Training FAQ
- Application form
- Webinars
- Partner Program
- Become a Partner
- Strategic Partners
- Distributors
- Map of Partners
- Events
- Forum
- Blog
- Bugs and Feature Requests
- Developers
- Community templates
- Newsletters
- About Us
- Career
- Contacts
- Press Releases
- Trademark
Join us! We’re hiring!
© 2001-2023 by Zabbix LLC. All rights reserved.
How to Install Zabbix on Mint GNU/Linux Distro
Hi! The Tutorial shows you Step-by-Step How to Install Zabbix 6.x Mint GNU/Linux Desktops.
First, the Zabbix Installation on Linux Mint is Easy it’s enough to Download & Install the Zabbix Packages.
And Zabbix is the Ultimate Enterprise-Level Software Designed for Real-Time Monitoring of Servers, Virtual machines and Network Devices.
Finally, Zabbix is Open Source and comes at No Cost!

GNU/Linux Mint Zabbix Installation Guide
Showing Ads here is the best solution I found for not embarassing somebody about participating in a #%$Foundation^.
«When the Last Tree has been cut down, the Last Fish caught, the Last River poisoned, only then will we realize that One Cannot Eat Money.»
«No usable Computer exists today with completely Open Software and Hardware (as much as some companies want to Market themselves as such).»
Follow Us
The GNU/Linux Free Software Phylosophy

Steve Jobs’ Last Words

«Being a Winner in a Free Computing OS Mission means to adopt a Commercial like Strategy. Transcending Duality in Oneness and so dispensing both Free and Non Free Software. Cause evangelizing Freedom in a Non Free World is like keeping a Trojan Horse. Hallelujah!»
«Using the Money just for buying Stuff and Not Supporting the Free Gift Philosophy is a sign of a Selfish and Narrow Mind.»
What can Save the World from a Blind and Quick Self-destruction.
The Immediate and Humble Mass Conversion to the Spiritual Way!
Because Earth & Nature has been Ravaged without Pity by the Wild and Selfish mass Competition to Win and Shown that U’re someone Better because you got a Lot of fla$hY Power$$$.
«Taking care if somebody is liking, following, or buying is just a serious hidrance on the priceless Way of Creative Freedom.»
Credits

Everlasting Glory to God, Jesus Christ, The Holy Spirit, Ganesha, Shiva, Vishnu, Krisna, Laozi, Buddha, Bodhidharma, Ma Gcig, Hakuin, Ikkyu, Nagarjuna, Tilopa, Naropa, Milarepa, Suhrawardi, St Dismas, St Francesco, St Teresa, St John, St Filippo, Eckehart. All The Holy Divinities, Avatars, Saints, Mystics, and True Spiritual Masters. Because they are in the Eternal Light of Truth & Delight Enlightening a World of Darkness, Nescience, Blindness, Uneasiness and Falsehood!
Install Zabbix 2.4.7 (Network Monitoring Tool) on Ubuntu, Mint & Debian
Zabbix is an enterprise level monitoring tool which monitors the entire IT infrastructure such as server, network and devices. Zabbix is completely an opensource and its currently supporting all major linux distribution like Debian, Ubuntu & CentOS. Its high performance, high availability & high capacity which is capable to manage 1000+ devices at a time is really commendable. One can manage everything using the normal web interface. Zabbix announced the latest release of Zabbix 2.4.7 version on November 12, 2015. Alternatively you can install other network monitoring tools such as Nagios, Cacti, Monitorix, Munin & Icinga2.
1) Prerequisites for Zabbix
You should install LAMP stack before proceeding Zabbix installation.
2) Install Zabbix repository
You can directly download the repository configuration package from Zabbix website based on your distribution and version.
# Zabbix repository For Ubuntu/Mint # $ sudo wget http://repo.zabbix.com/zabbix/2.4/ubuntu/pool/main/z/zabbix-release/zabbix-release_2.4-1+trusty_all.deb $ sudo dpkg -i zabbix-release_2.4-1+trusty_all.deb $ sudo apt-get update # Zabbix repository For Debian # $ sudo wget http://repo.zabbix.com/zabbix/2.4/debian/pool/main/z/zabbix-release/zabbix-release_2.4-1+wheezy_all.deb $ sudo dpkg -i zabbix-release_2.4-1+wheezy_all.deb $ sudo apt-get update
3) Install Zabbix Server
Run the below command to install Zabbix server with mysql and front-end web interface. While installing you need to give mysql root password to create zabbix database.
$ sudo apt-get install zabbix-server-mysql zabbix-frontend-php zabbix-java-gateway
To configure MySQL database for Zabbix, hit Yes 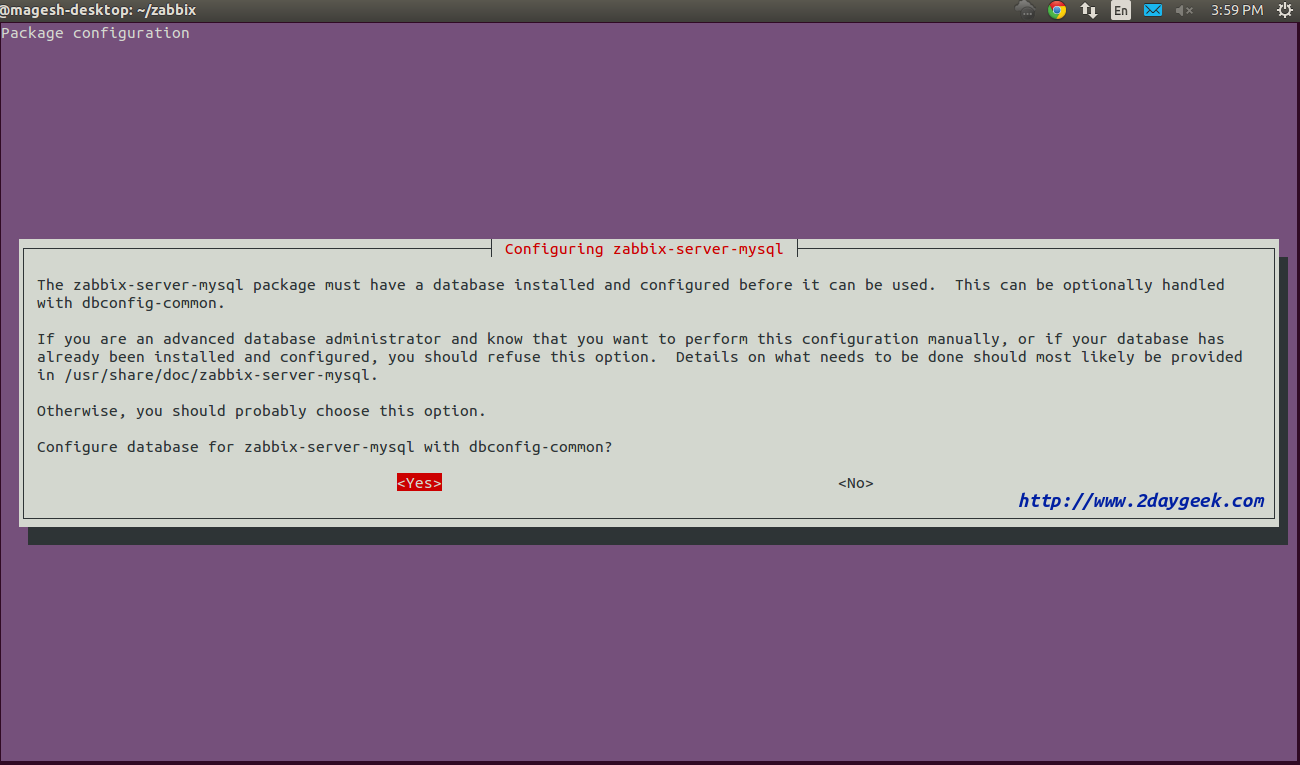
Provide the MySQL root password to create Zabbix database on your system, and then hit OK 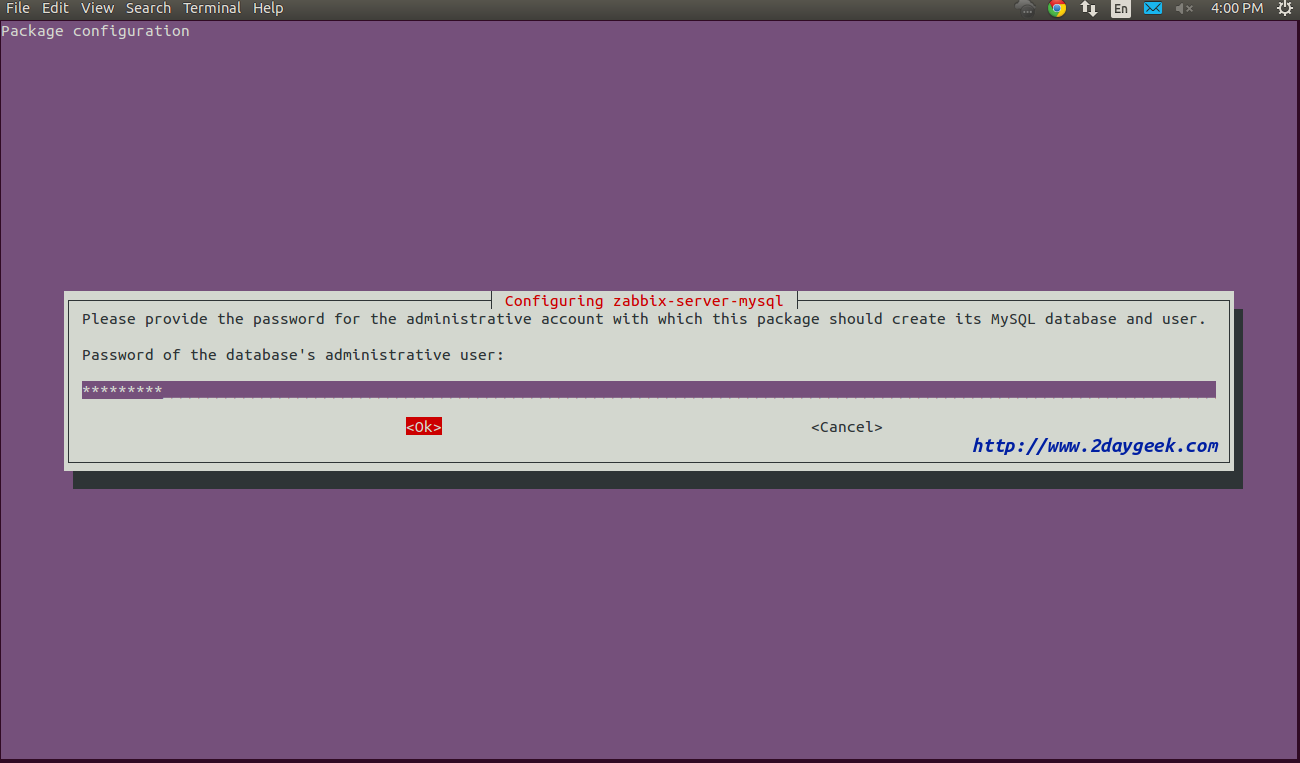
Provide the MySQL password for Zabbix database, and then finally hit OK 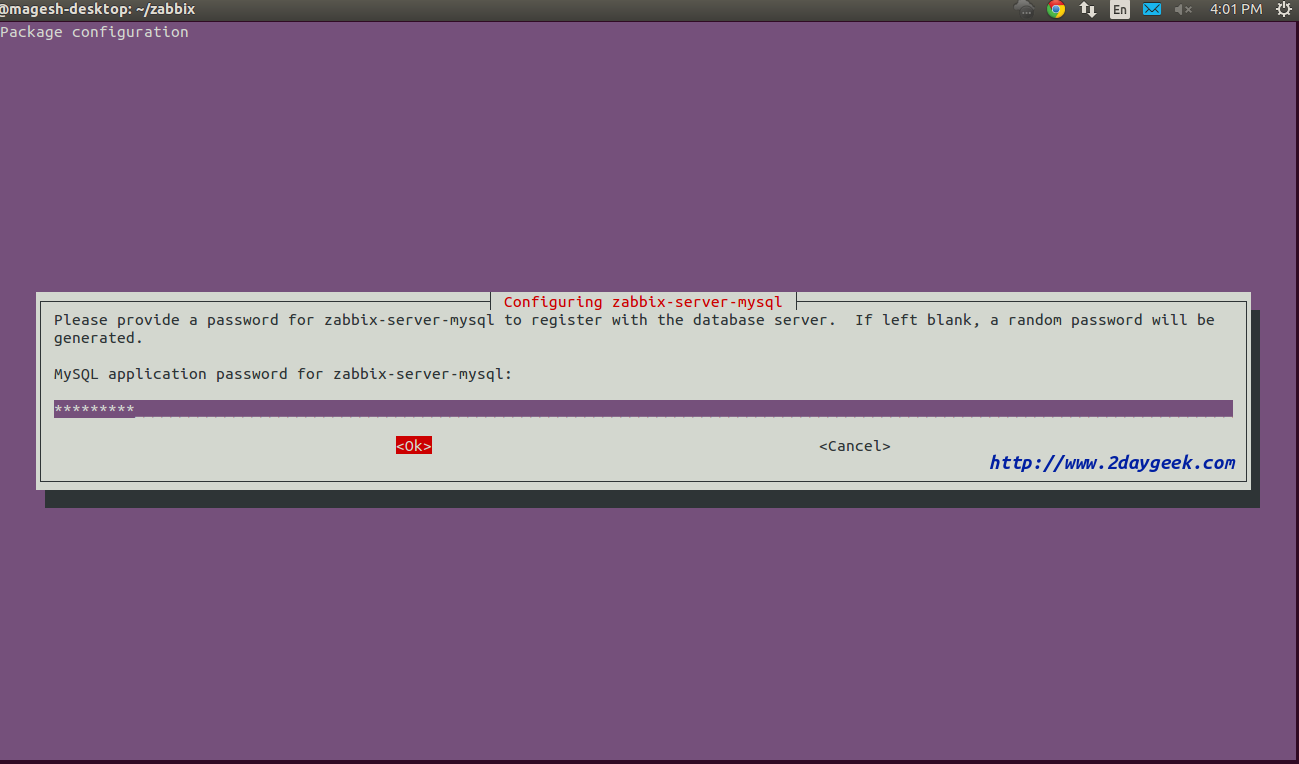
Confirm the MySQL password for Zabbix database, hit OK 
4) Editing PHP configuration for Zabbix frontend
Apache configuration file for Zabbix frontend is located in /etc/zabbix/apache.conf By default everything is fine and you need to add your time zone.
$ sudo nano /etc/zabbix/apache.conf php_value date.timezone Asia/Kolkata 5) Start/Restart services
Start/Restart services before proceeding Zabbix Web Installation.
# Start/Restart the service in SysVinit Systeme # $ sudo service start zabbix-server $ sudo service start zabbix-agent $ sudo service restart apache2 $ sudo service restart mysql $ sudo chkconfig zabbix-server on $ sudo chkconfig zabbix-agent on # Start/Restart the service in Systemd Systeme # $ sudo systemctl start zabbix-server.service $ sudo systemctl start zabbix-agent.service $ sudo systemctl restart apache2.service $ sudo systemctl restart mariadb.service $ sudo systemctl enable zabbix-server.service $ sudo systemctl enable zabbix-agent.service
6) Zabbix frontend installation
Navigate your browser to http://localhost/zabbix or http://IP-Address/zabbix or http://Domain-Name/zabbix and it will redirect to http://localhost/zabbix/setup.php
Zabbix 2.4.x Welcome screen, Just hit NEXT to continue. 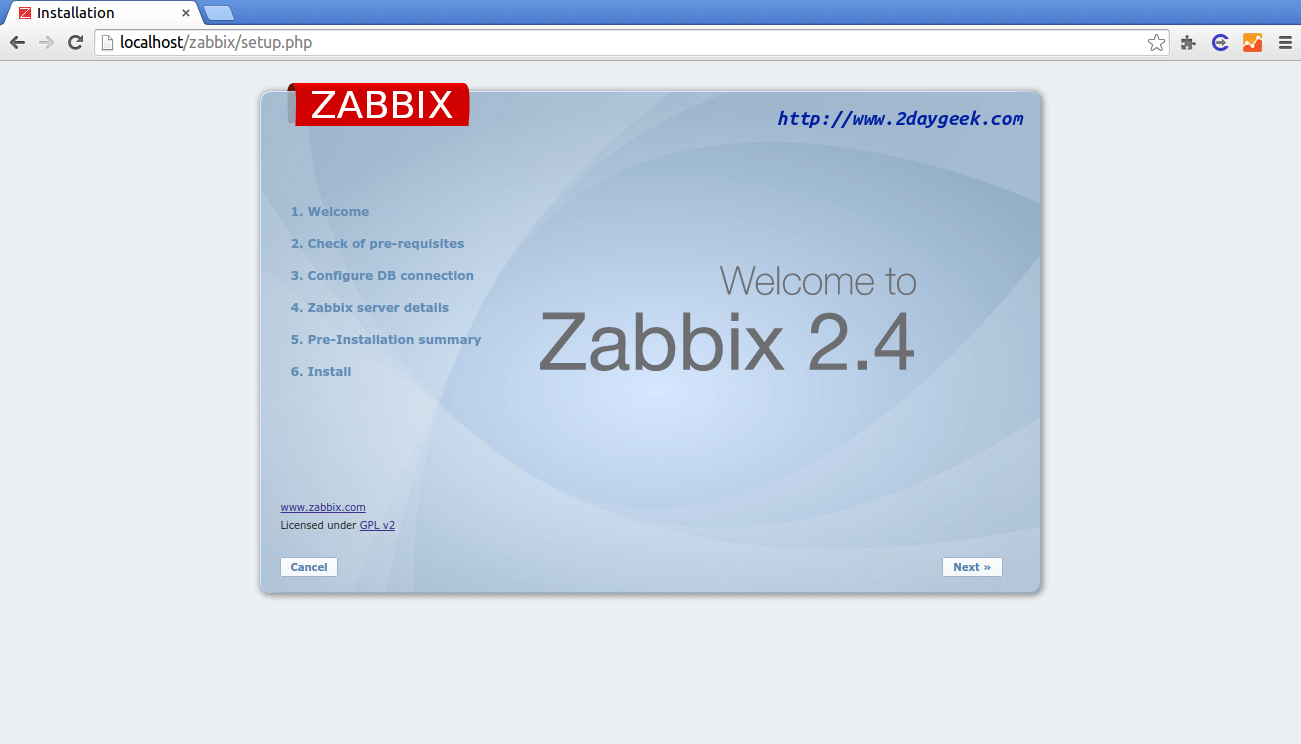
Checking all per-requisites packages which are available, then hit NEXT to continue. 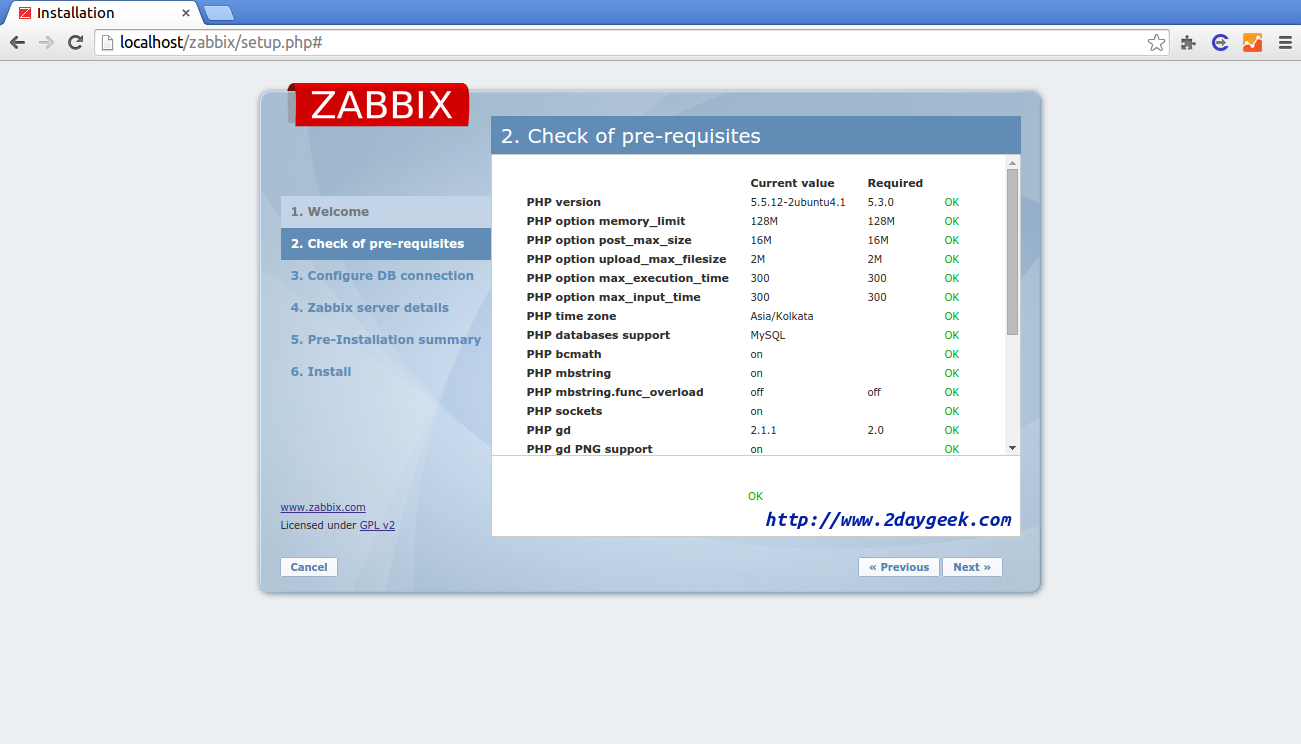
Enter Database details which you created also enter root database details, then hit Test Connection. If Test Connection is ok Click NEXT to continue. 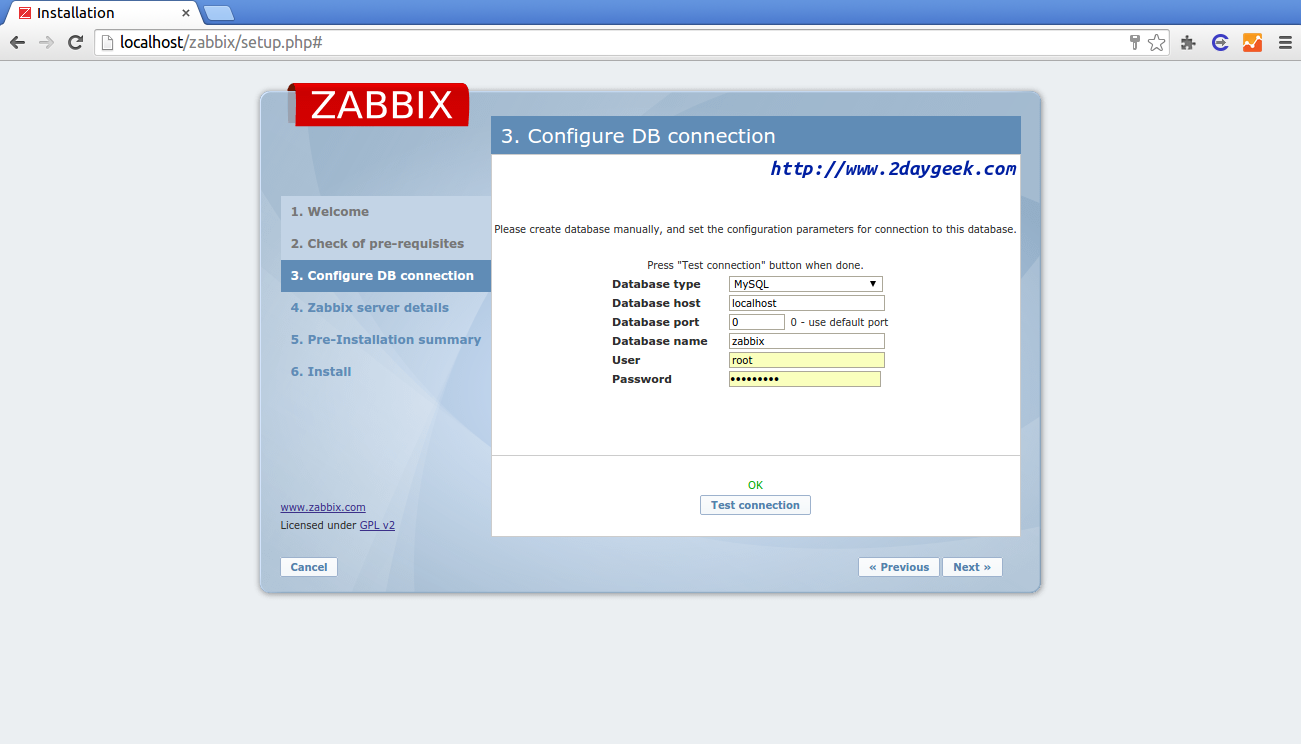
Enter Zabbix server Name here, then hit NEXT to continue. 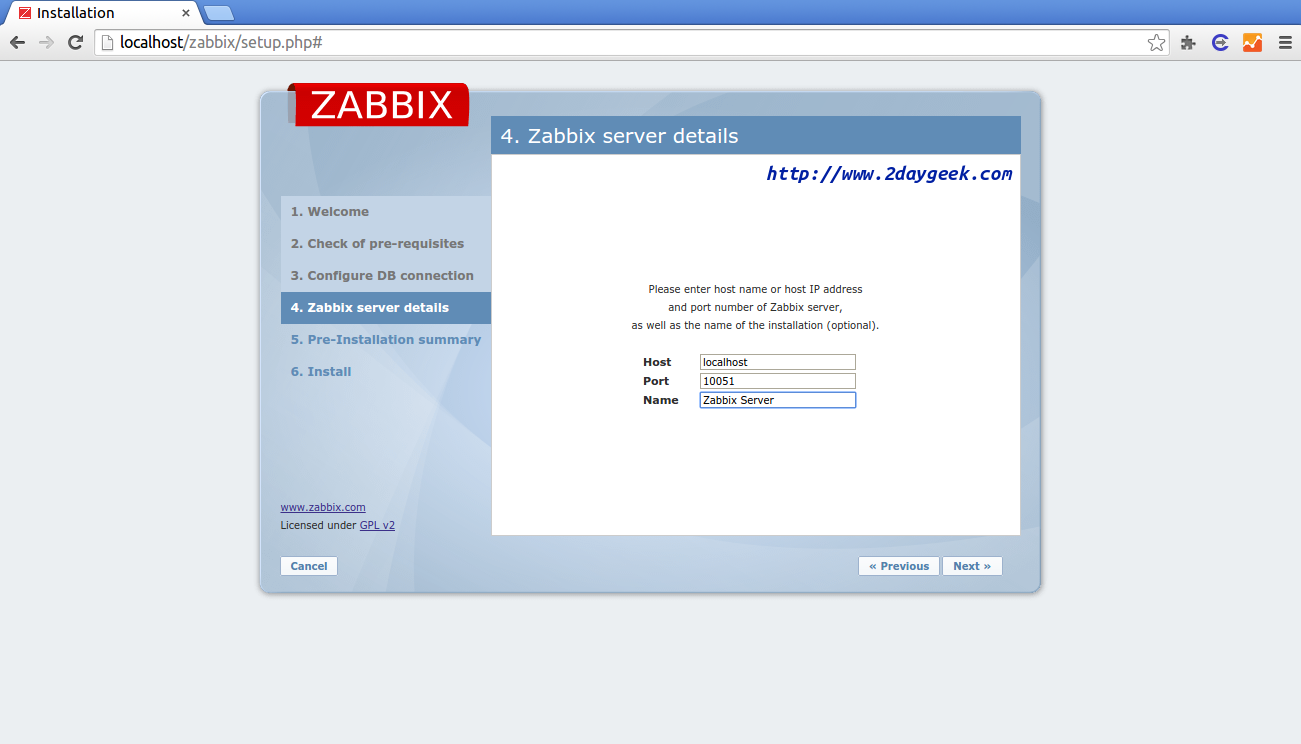
Check Pre-Installation Summary once, then hit NEXT to continue. 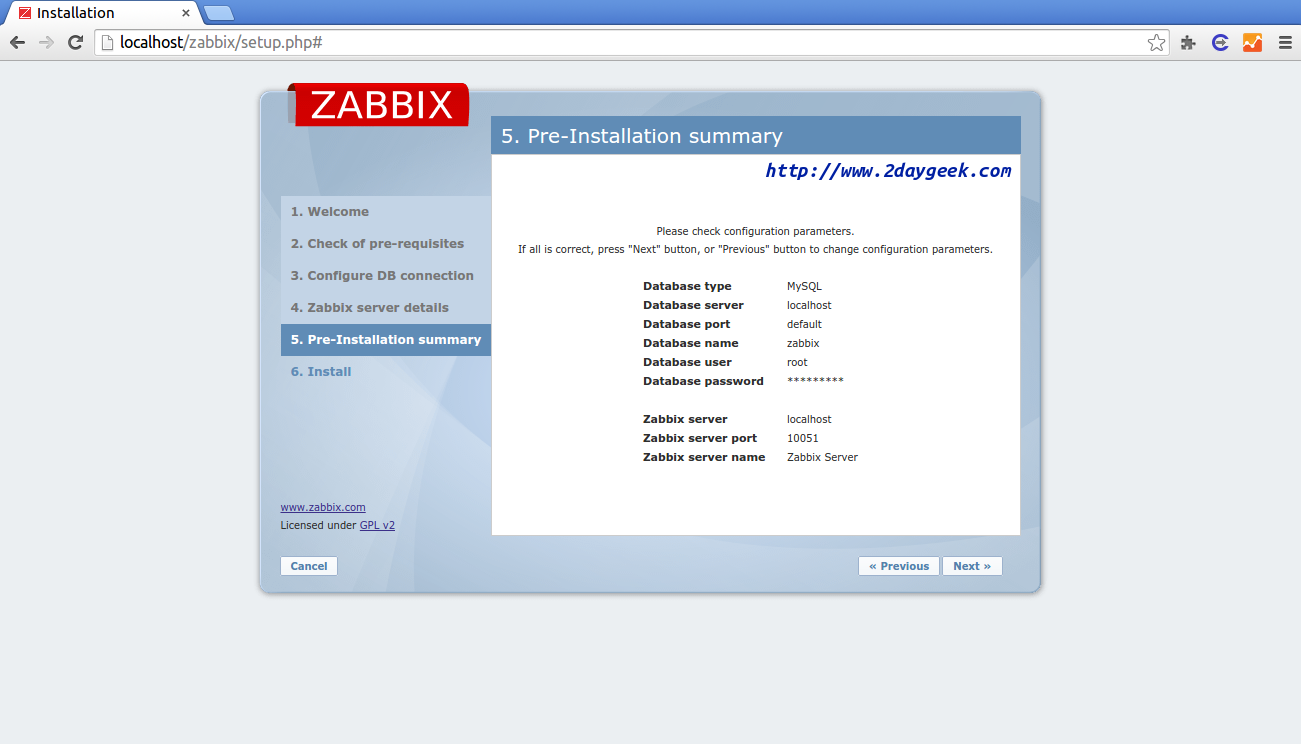
Click Finish to complete the installation. 
Login to Zabbix Web Interface, After hitting finish it will automatically redirect to login page. By default Username :admin and password Password : zabbix. 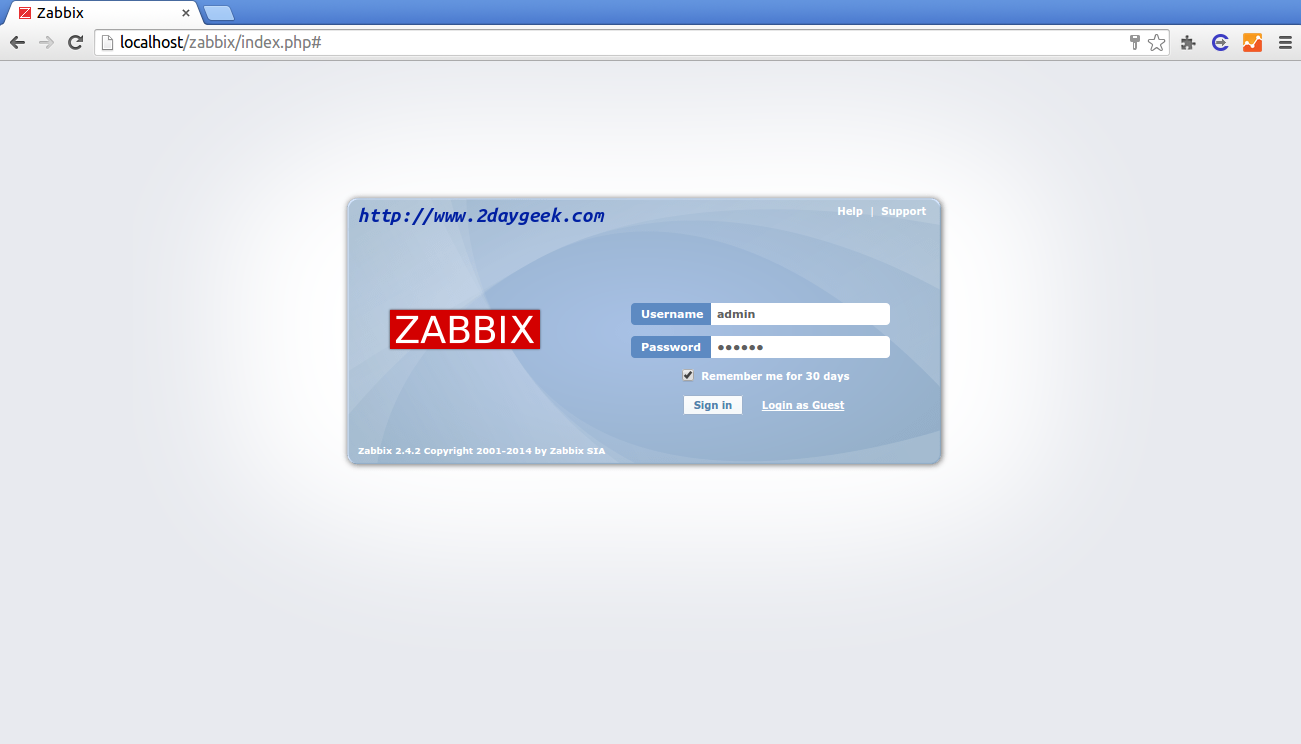
You have successfully installed Zabbix server. By default you will get this page after login. 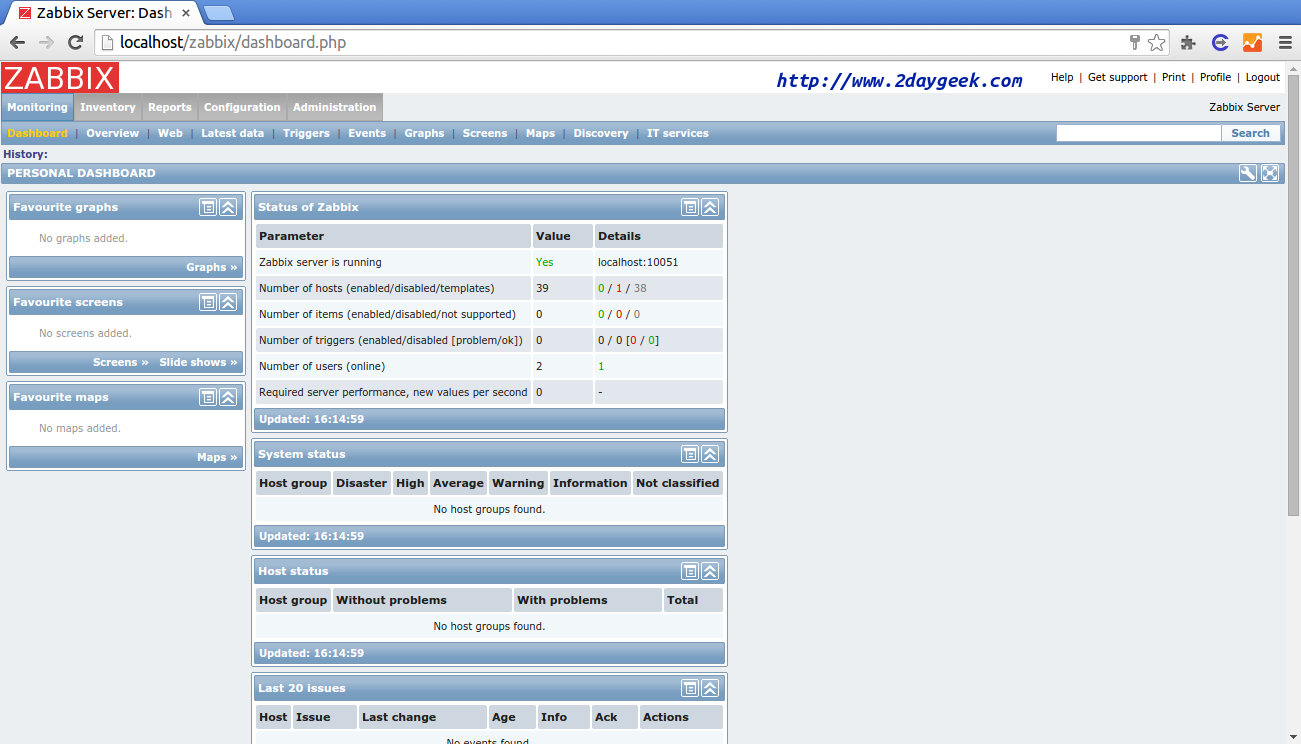
Checking zabbix server host : Configuration >> Hosts, By default zabbix server host added automatically but it’s not enabled. Before enabling you need to install zabbix agent on your server machine so that it will notify the alerts to the server. 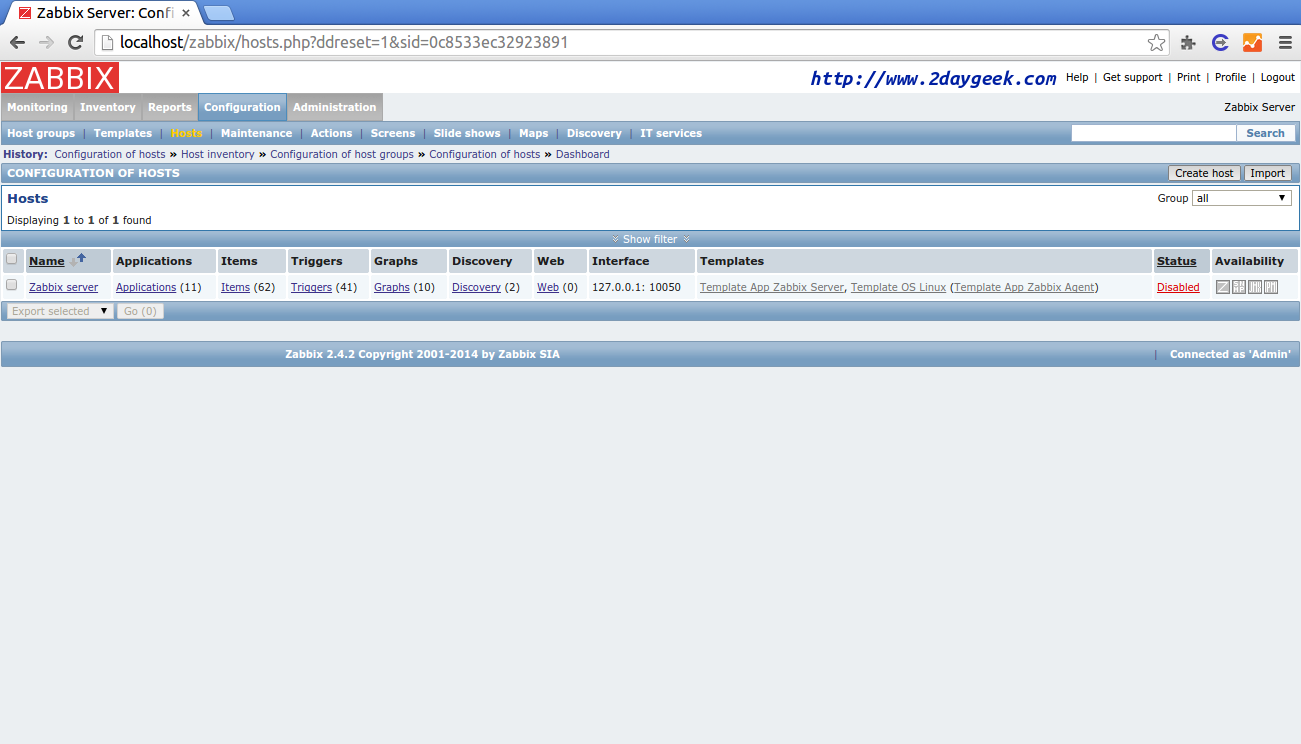
7) Install zabbix agent installation
Install zabbix agent in zabbix server because zabbix agent only notify all the alerts to zabbix server.
$ sudo apt-get install zabbix-agent
Enable the Zabbix server host : Configuration >> Hosts >> click the server host name >> scroll down >> TICK the check box “Enabled” >> Update. 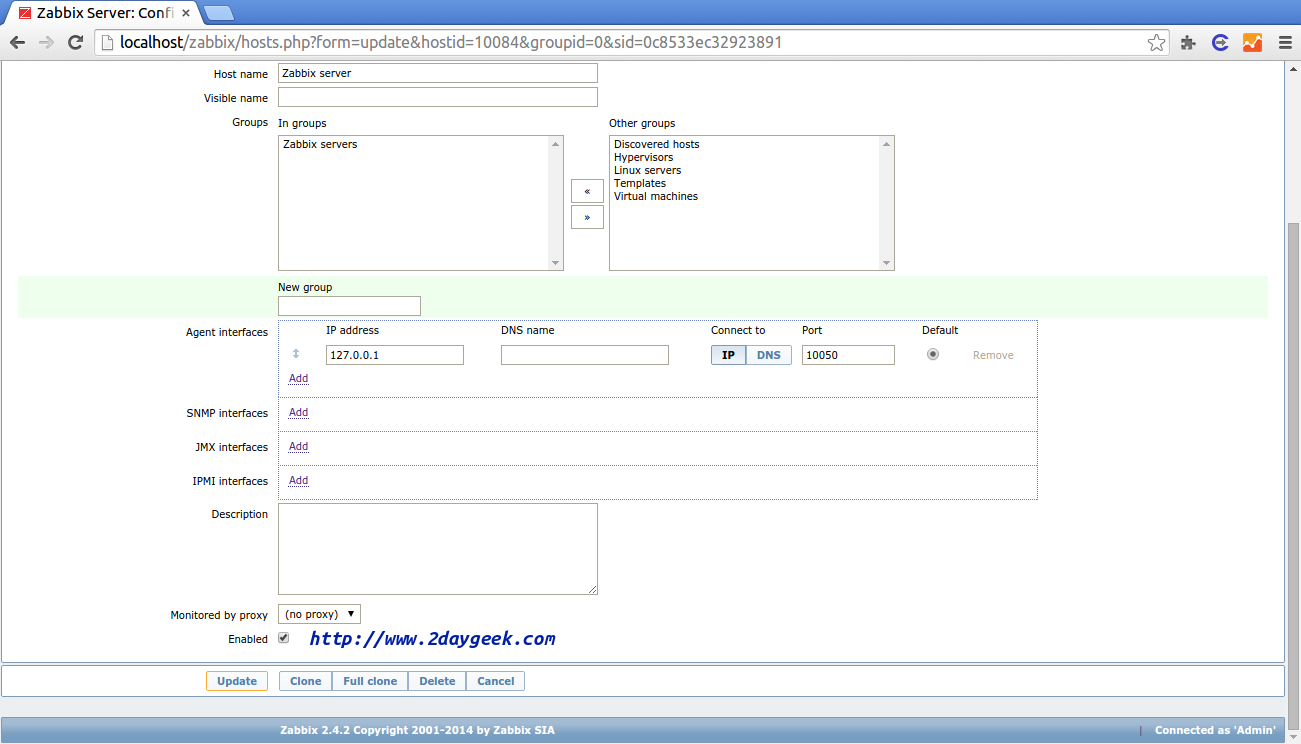
Now, Zabbix server host has started monitoring itself. 
In this article we have clearly explained how to install Zabbix server 2.4.2 on Ubuntu 14.10. Stay tuned with us.. In our future article will show how to add Linux & Windows Host’s to Zabbix server.
Post your valuable feedback/suggestions!! Thank you !!