- Running the Notebook#
- Introducing the Notebook Server’s Command Line Options#
- How do I open a specific Notebook?#
- How do I start the Notebook using a custom IP or port?#
- How do I start the Notebook server without opening a browser?#
- How do I get help about Notebook server options?#
- Using a command-line interface#
- Установка Jupyter Notebook на CentOS
- Установка и запуск
- Запуск в качестве сервиса
- Running the Notebook#
- Introducing the Notebook Server’s Command Line Options#
- How do I open a specific Notebook?#
- How do I start the Notebook using a custom IP or port?#
- How do I start the Notebook server without opening a browser?#
- How do I get help about Notebook server options?#
- Using a command-line interface#
Running the Notebook#
After you have installed the Jupyter Notebook on your computer, you are ready to run the notebook server. You can start the notebook server from the command line (using Terminal on Mac/Linux, Command Prompt on Windows) by running:
This will print some information about the notebook server in your terminal, including the URL of the web application (by default, http://localhost:8888 ):
$ jupyter notebook [I 08:58:24.417 NotebookApp] Serving notebooks from local directory: /Users/catherine [I 08:58:24.417 NotebookApp] 0 active kernels [I 08:58:24.417 NotebookApp] The Jupyter Notebook is running at: http://localhost:8888/ [I 08:58:24.417 NotebookApp] Use Control-C to stop this server and shut down all kernels (twice to skip confirmation).
It will then open your default web browser to this URL.
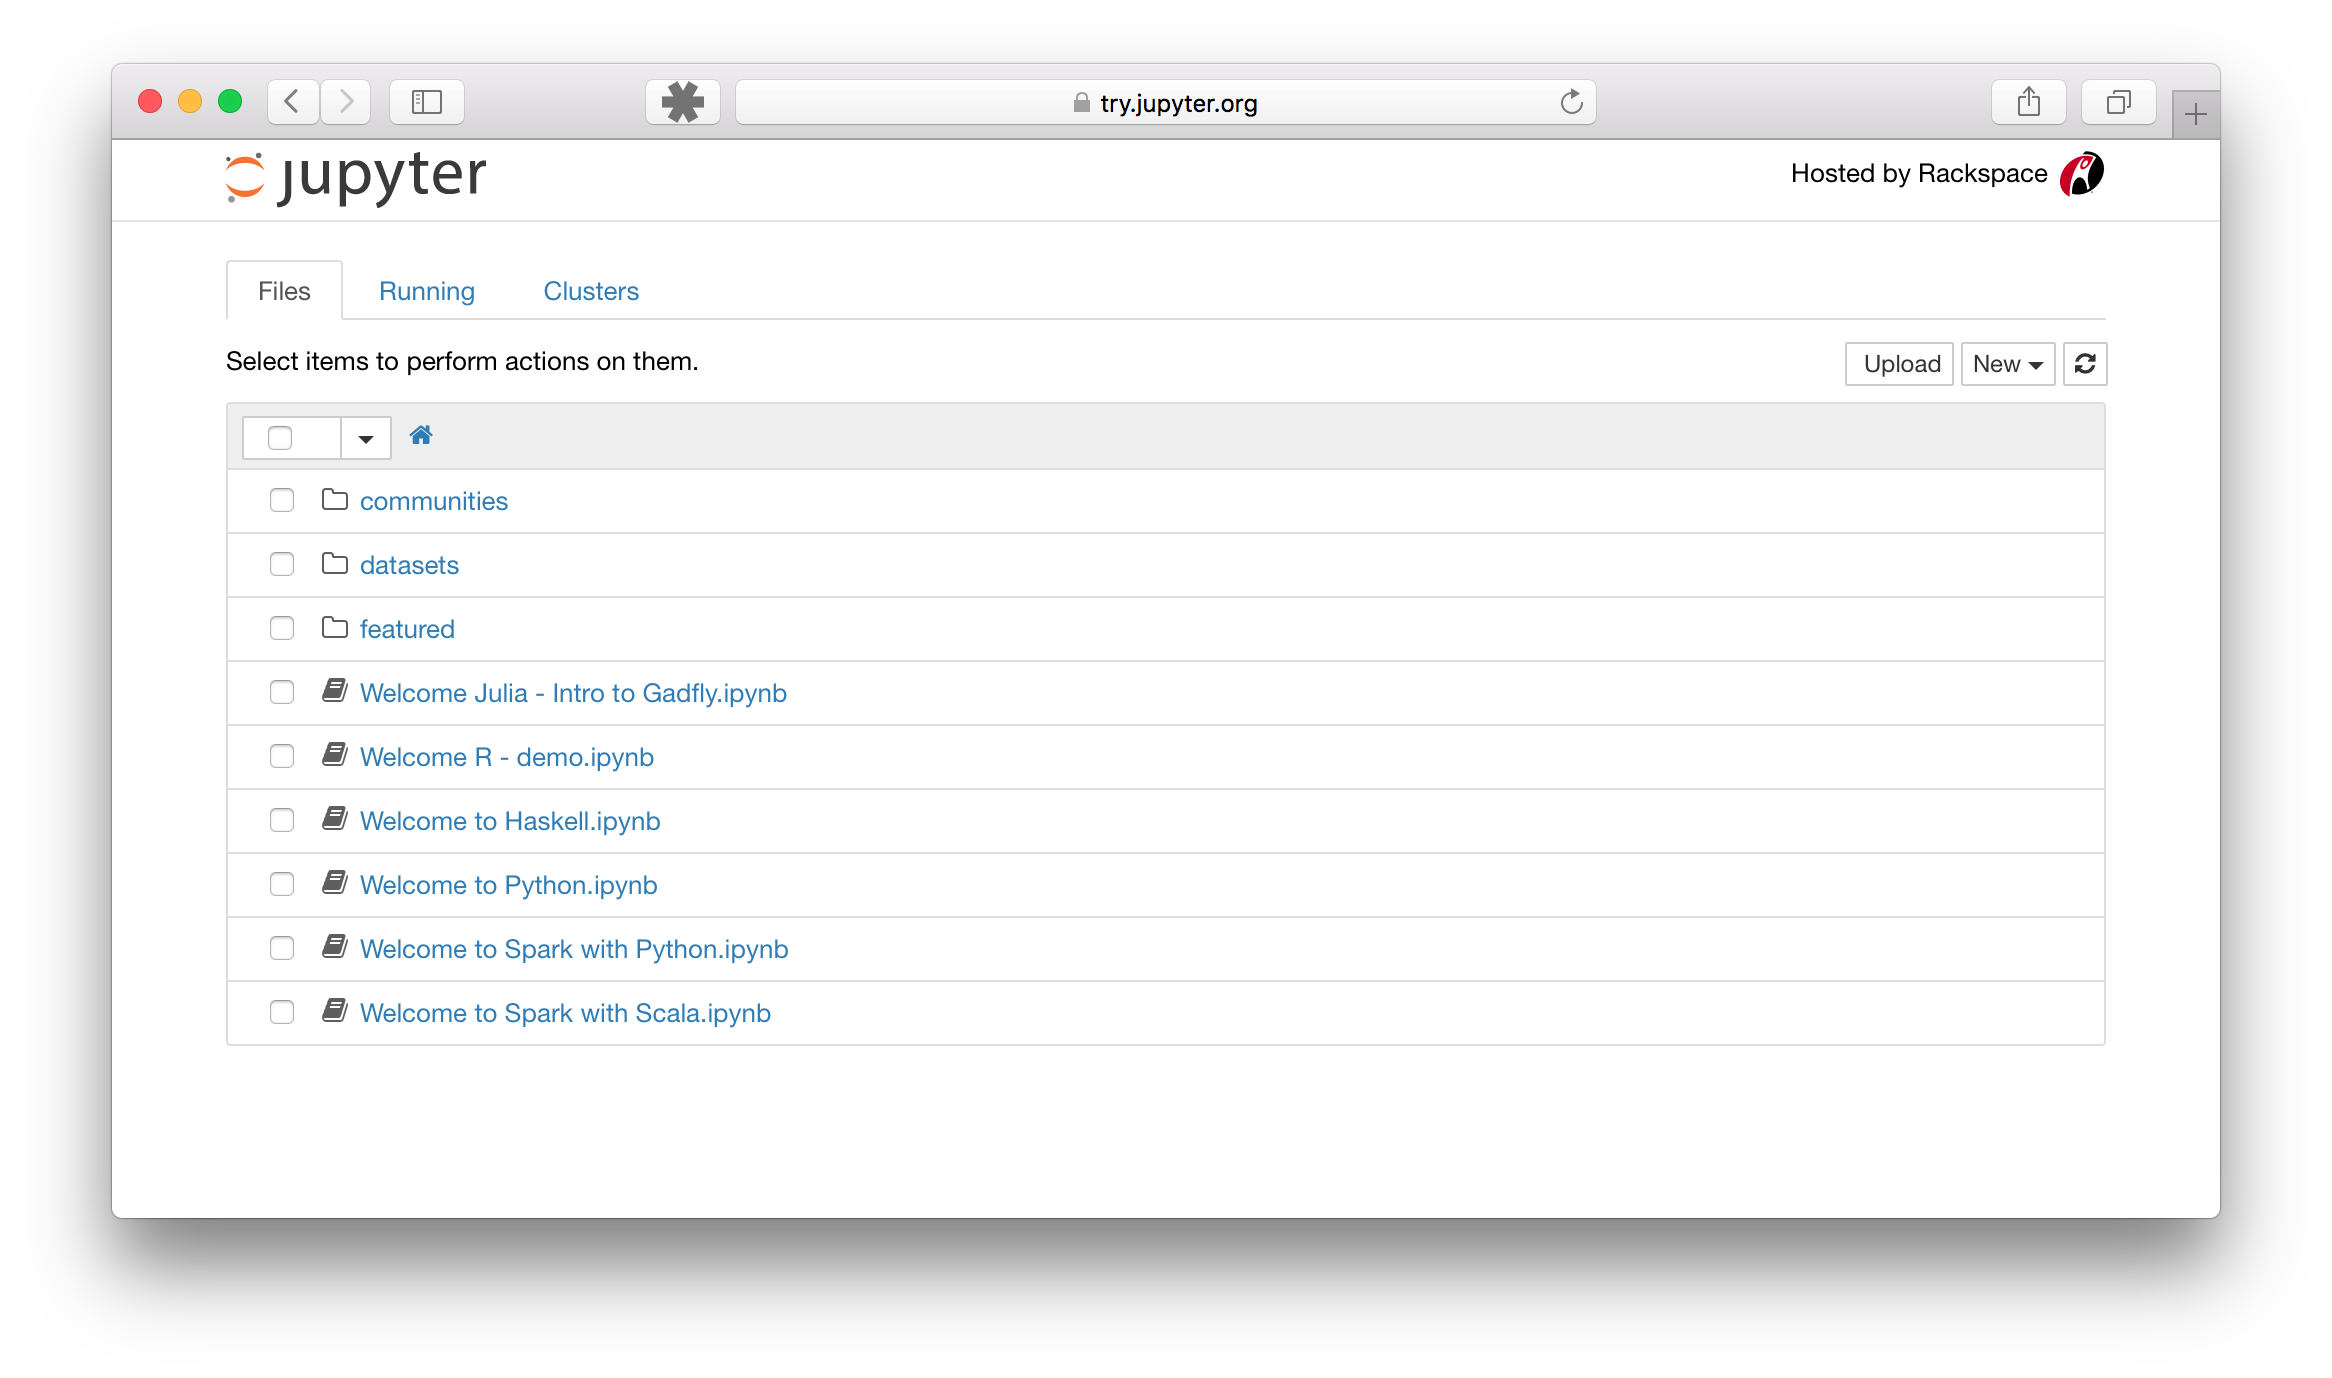
When the notebook opens in your browser, you will see the Notebook Dashboard , which will show a list of the notebooks, files, and subdirectories in the directory where the notebook server was started. Most of the time, you will wish to start a notebook server in the highest level directory containing notebooks. Often this will be your home directory.
Notebook Dashboard
Introducing the Notebook Server’s Command Line Options#
How do I open a specific Notebook?#
The following code should open the given notebook in the currently running notebook server, starting one if necessary.
jupyter notebook notebook.ipynb
How do I start the Notebook using a custom IP or port?#
By default, the notebook server starts on port 8888. If port 8888 is unavailable or in use, the notebook server searches the next available port. You may also specify a port manually. In this example, we set the server’s port to 9999:
jupyter notebook --port 9999 How do I start the Notebook server without opening a browser?#
Start notebook server without opening a web browser:
jupyter notebook --no-browser
How do I get help about Notebook server options?#
The notebook server provides help messages for other command line arguments using the —help flag:
Detailed information about command line arguments, configuration, and usage.
Using a command-line interface#
Notebooks can be executed from your terminal using the run subcommand. It expects notebook paths as input arguments and accepts optional flags to modify the default behavior.
Running a notebook is this easy.
jupyter run notebook.ipynb
You can pass more than one notebook as well.
jupyter run notebook.ipynb notebook2.ipynb
By default, notebook errors will be raised and printed into the terminal. You can suppress them by passing the —allow-errors flag.
jupyter run notebook.ipynb --allow-errors
For more sophisticated execution options, consider the papermill library.
Установка Jupyter Notebook на CentOS

Опубликовано: 18.11.2020
Jupyter Notebook — это приложение для создания книг и документов из вычислительного материала (в формате .ipynb). Его установка и запуск должны выполняться от пользователя с правами, отличными от root. В данной инструкции мы будем выполнять часть операций от последнего, остальное — от пользователя jupyter. Руководство подходит для Linux CentOS версий 7 и 8. Перед установкой можно ознакомиться с приложением онлайн на официальном сайте.
Установка и запуск
- gcc — набор компиляторов для разных языков программирования.
- python3-devel — средства для разработки Python. Библиотеки и инструменты для создания своих модулей и возможности встраивания Python в другие приложения.
- python3-pip — инструмент для установки пакетов python.
- kernel-headers — заголовочные файлы ядра. Необходимы для сборки модулей последнего.
Создаем пользователя, от которого будем запускать Jupyter Notebook:
* наш пользователь будет с именем jupyter. Также мы сразу создаем для него домашний каталог.
Создаем правило в брандмауэре для подключения к Jupyter Notebook по сети:
# firewall-cmd —permanent —add-port=8080/tcp
* предполагается, что наш сервис будет запускаться на порту 8080.
Применяем настройки firewalld:
Заходим в систему под созданным пользователем jupyter:
Выполним установку питон-приложения jupyter:
$ pip3 install —user jupyter
Проверить корректность установки можно командой:
Мы должны увидеть версию установленного приложения, например:
jupyter core : 4.7.0
jupyter-notebook : 6.1.5
qtconsole : 4.7.7
ipython : 7.16.1
ipykernel : 5.3.4
jupyter client : 6.1.7
jupyter lab : not installed
nbconvert : 6.0.7
ipywidgets : 7.5.1
nbformat : 5.0.8
traitlets : 4.3.3
* обратите внимание, что в списке есть jupyter lab, который не установлен. При желании, его устанавливаем командой: pip3 install —user jupyterlab.
Создаем конфигурационный файл для Jupyter Notebook:
jupyter notebook —generate-config
Он должен появиться в домашней директории пользователя jupyter:
Writing default config to: /home/jupyter/.jupyter/jupyter_notebook_config.py
Задаем пароль для входа в веб-панель:
$ jupyter notebook password
Дважды вводим пароль — система создаст для него хэш и сохранить в домашней папке пользователя:
Enter password:
Verify password:
[NotebookPasswordApp] Wrote hashed password to /home/jupyter/.jupyter/jupyter_notebook_config.json
$ jupyter notebook —no-browser —ip=0.0.0.0 —port=8080
* в данном примере мы запускаем jupyter notebook на порту 8080 и на всех сетевых интерфейсах.
Открываем браузер и переходим по пути http://:8080 — должна открывать страница с формой ввода пароля, который мы создавали ранее — вводим его:

Откроется страница Jupyter Notebook:

Если jupyter notebook не открывается в браузере, запускаем другую консоль на компьютере с приложением и выполняем команду:
Мы должны увидеть что-то на подобие:
tcp LISTEN 0 128 0.0.0.0:8080 0.0.0.0:* users:((«jupyter-noteboo»,pid=8510,fd=5))
В противном случае проверяем, что у нас запустилось приложение. Но если команда ss -tunlp | grep 8080 показала наличие сервиса, который слушает на порту 8080, еще раз проверяем настройки брандмауэра:
Мы должны увидеть правило:
После окончания работы можно выходить из-под пользователя jupyter:
Запуск в качестве сервиса
Мы установили и запустили наше приложение из консоли. Однако, если мы хотим, чтобы Jupyter Notebook запускался как сервис автоматически, создаем юнит в systemd:
[Unit]
Description=Jupyter Notebook Service
After=network.target
[Service]
User=jupyter
Group=jupyter
Type=simple
WorkingDirectory=/home/jupyter
ExecStart=/home/jupyter/.local/bin/jupyter notebook —no-browser —ip=0.0.0.0 —port=8080
ExecReload=/bin/kill -HUP $MAINPID
Restart=on-failure
Перечитываем конфигурацию systemd:
Running the Notebook#
After you have installed the Jupyter Notebook on your computer, you are ready to run the notebook server. You can start the notebook server from the command line (using Terminal on Mac/Linux, Command Prompt on Windows) by running:
This will print some information about the notebook server in your terminal, including the URL of the web application (by default, http://localhost:8888 ):
$ jupyter notebook [I 08:58:24.417 NotebookApp] Serving notebooks from local directory: /Users/catherine [I 08:58:24.417 NotebookApp] 0 active kernels [I 08:58:24.417 NotebookApp] The Jupyter Notebook is running at: http://localhost:8888/ [I 08:58:24.417 NotebookApp] Use Control-C to stop this server and shut down all kernels (twice to skip confirmation).
It will then open your default web browser to this URL.
When the notebook opens in your browser, you will see the Notebook Dashboard , which will show a list of the notebooks, files, and subdirectories in the directory where the notebook server was started. Most of the time, you will wish to start a notebook server in the highest level directory containing notebooks. Often this will be your home directory.
Notebook Dashboard

Introducing the Notebook Server’s Command Line Options#
How do I open a specific Notebook?#
The following code should open the given notebook in the currently running notebook server, starting one if necessary.
jupyter notebook notebook.ipynb
How do I start the Notebook using a custom IP or port?#
By default, the notebook server starts on port 8888. If port 8888 is unavailable or in use, the notebook server searches the next available port. You may also specify a port manually. In this example, we set the server’s port to 9999:
jupyter notebook --port 9999 How do I start the Notebook server without opening a browser?#
Start notebook server without opening a web browser:
jupyter notebook --no-browser
How do I get help about Notebook server options?#
The notebook server provides help messages for other command line arguments using the —help flag:
Detailed information about command line arguments, configuration, and usage.
Using a command-line interface#
Notebooks can be executed from your terminal using the run subcommand. It expects notebook paths as input arguments and accepts optional flags to modify the default behavior.
Running a notebook is this easy.
jupyter run notebook.ipynb
You can pass more than one notebook as well.
jupyter run notebook.ipynb notebook2.ipynb
By default, notebook errors will be raised and printed into the terminal. You can suppress them by passing the —allow-errors flag.
jupyter run notebook.ipynb --allow-errors
For more sophisticated execution options, consider the papermill library.